OpenObserve Report Server Setup: Generate and Email Dashboards




Ready to get started?
Try OpenObserve Cloud today for more efficient and performant observability.
OpenObserve Report Server Setup: Generate and Email Dashboards
Use the OpenObserve Report Server to capture dashboards as PDFs and email them on a schedule. Configure Docker, SMTP (Gmail/SES), and env vars, then create reports from your dashboards. Perfect for audits and stakeholders who don’t log in daily.
Introduction
Dashboards are ideal for real-time observability, but most stakeholders don’t log into OpenObserve on a daily basis. For compliance, audits, and regular visibility, you can easily schedule PDF reports.
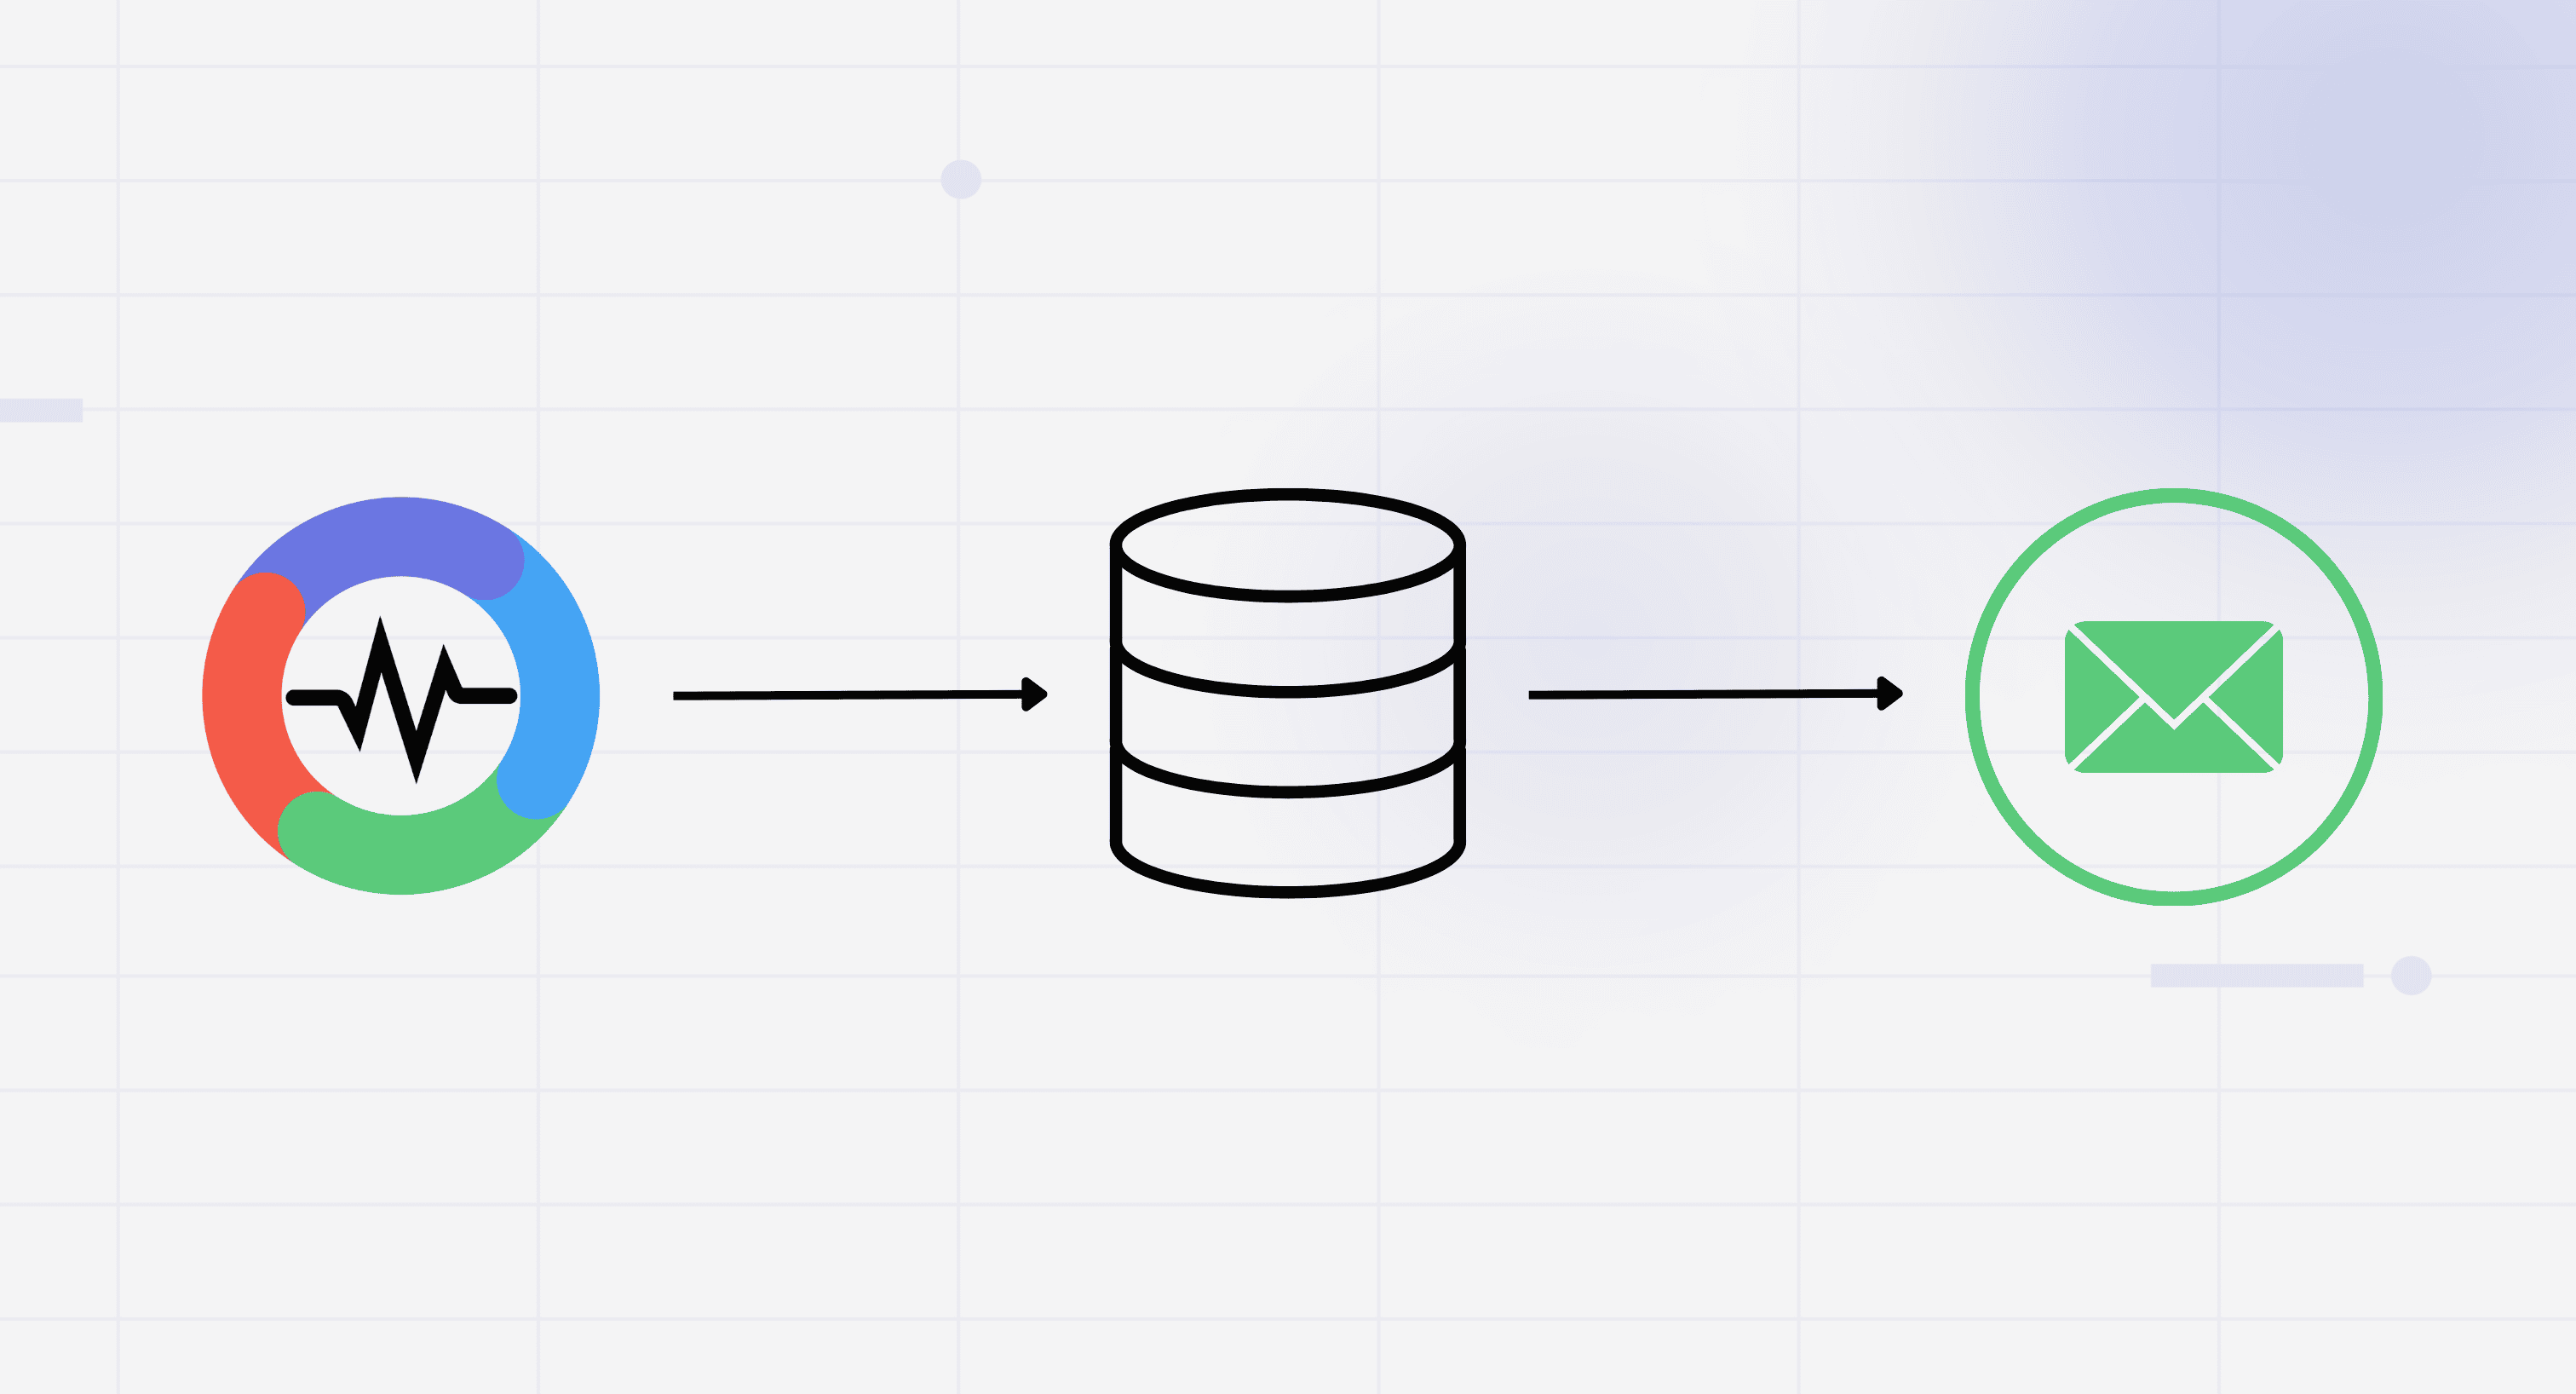
That’s where the OpenObserve Report Server comes in. It converts your dashboards into PDF reports and automatically delivers them by email on a set schedule.
Unlike alerts, which notify you immediately when something goes wrong, reports provide scheduled summaries that capture the bigger picture over time. Think of alerts as fire alarms and reports as monthly health checkups: one offers instant protection, the other long-term insight.
In this guide, we’ll cover what the OpenObserve Report Server is, why it’s important, and how to set it up step-by-step in Docker.
Why Do You Need a Report Server?
- Shareable reports → Send daily/weekly summaries to management or non-technical teams.
- Compliance snapshots → Capture dashboards as PDFs for audits.
- Hands-free reporting → No more manual exports or screenshots.
- Automation → Schedule once, let the system handle delivery.
Dashboards provide real-time insights, while the report server ensures that knowledge is consistently shared.
What is the OpenObserve Report Server?
The Report Server is a OpenObserve service that:
- Logs into your OpenObserve web UI (using the credentials you provide).
- Loads dashboards/charts via Chromium in headless mode.
- Renders them into PDFs or images.
- Send them via SMTP (email).
- Exposes an HTTP API for OpenObserve to trigger report jobs.
When OpenObserve wants to generate a scheduled alert or report, it talks to the report-server over HTTP.
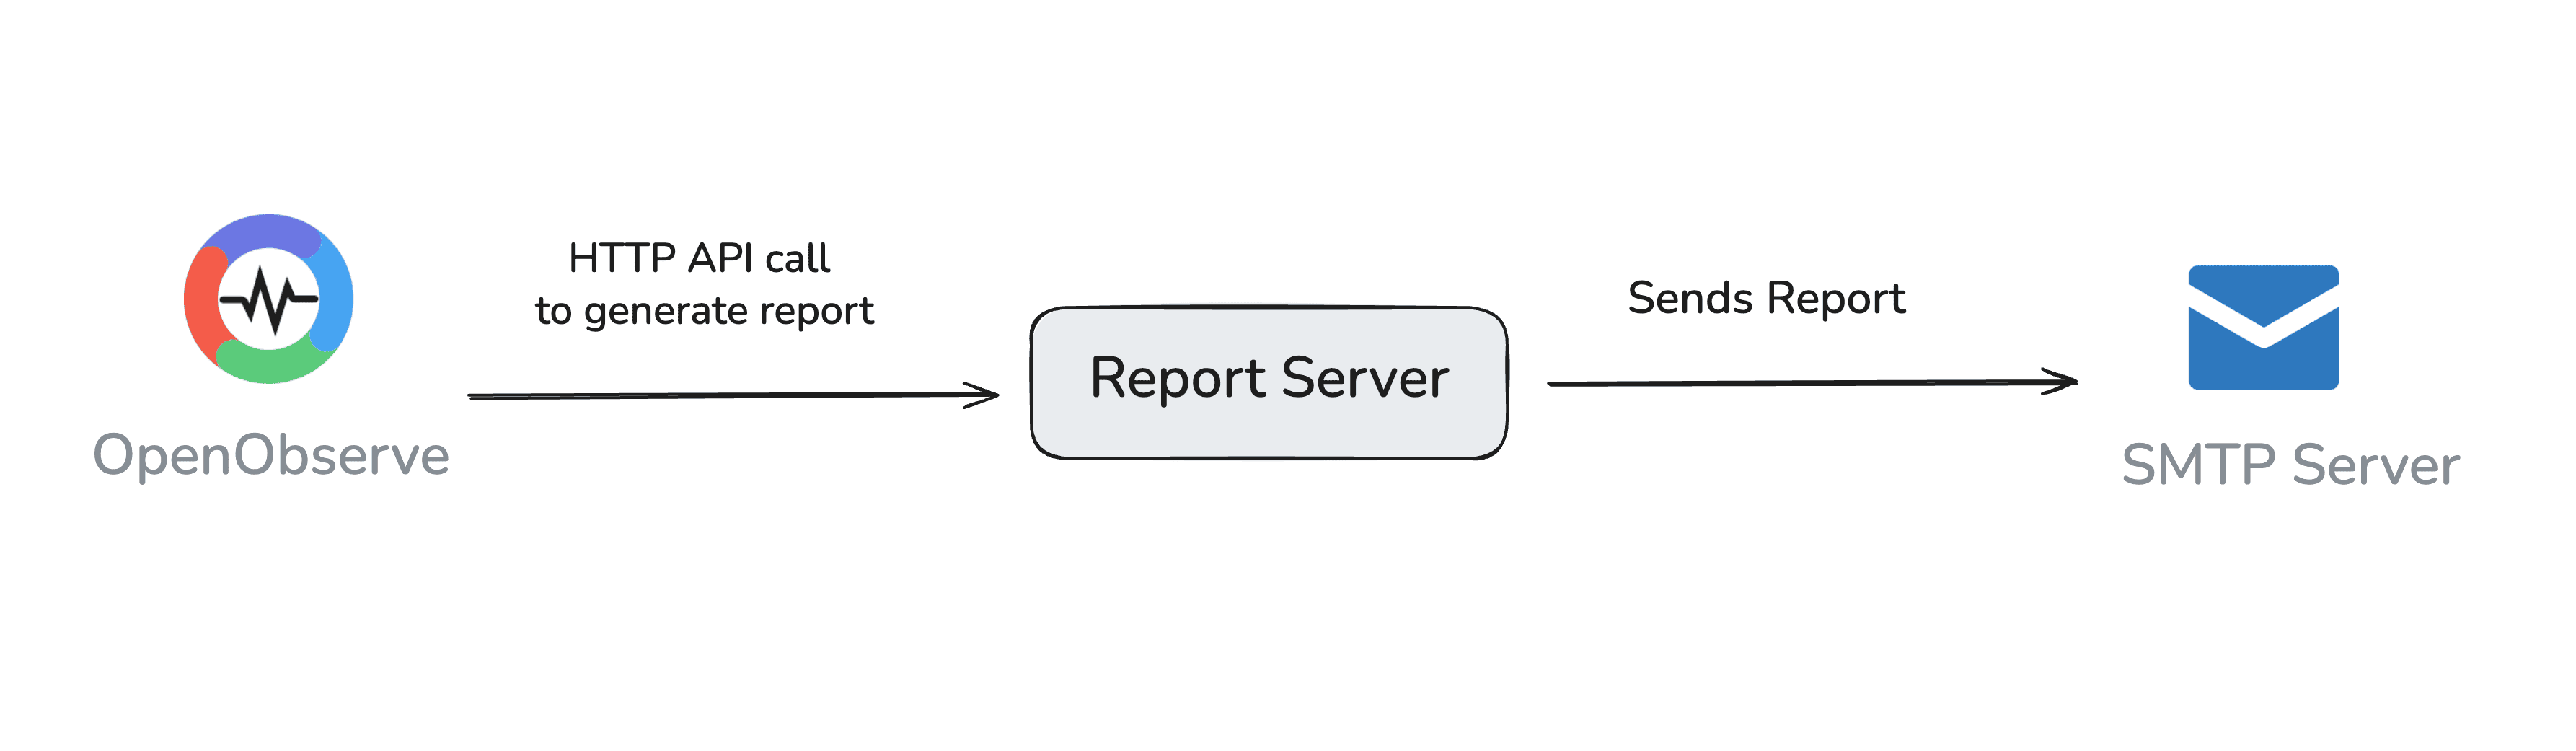
How the Report Server Sends Emails
The report server itself doesn’t come with an SMTP engine; it connects to an external SMTP service. This can be:
- Gmail / Google Workspace: requires App Passwords.
- Microsoft Outlook / Office 365: requires SMTP relay settings.
- Amazon SES, highly reliable for production email.
- Your Company SMTP server, usually on port 25/587.
Understanding Report Server Environment Variables
Here’s what matters most:
Authentication
ZO_REPORT_USER_EMAIL→ Report server admin login (should match your OpenObserve admin)ZO_REPORT_USER_PASSWORD→ Report server admin password
HTTP Server
ZO_HTTP_PORT→ Port where report server listens (default:5090)ZO_HTTP_ADDR→ Bind address (0.0.0.0for all interfaces)
Chrome Settings
ZO_CHROME_NO_SANDBOX→ Required in Docker (true)ZO_CHROME_PATH→ Custom Chrome binary (optional, auto-downloads if missing)ZO_CHROME_WINDOW_WIDTH/HEIGHT→ Browser viewport size for rendering PDFs
SMTP Settings (for sending emails)
ZO_SMTP_HOST→ SMTP server (smtp.gmail.comfor Gmail)ZO_SMTP_PORT→ Port (465for SSL,587for STARTTLS)ZO_SMTP_USER_NAME→ Gmail email addressZO_SMTP_PASSWORD→ Gmail App Password (not your normal password)ZO_SMTP_FROM_EMAIL→ Sender’s email (same as Gmail ID)ZO_SMTP_ENCRYPTION→ssltls(for port 465) orstarttls(for port 587)
OpenObserve Integration
ZO_WEB_URL→ OpenObserve web URL (exposed on port5080)ZO_REPORT_SERVER_URL→ Where OpenObserve can reach the report server (http://report-server:5090)
What We’ll Do in This Guide
In this step-by-step tutorial, we’ll set up the O2 Report Server alongside OpenObserve and get it to send reports by email. Specifically, we will:
- Run OpenObserve in a Docker container.
- Deploy the Report Server in a separate container.
- Configure SMTP settings to enable reports to be delivered via email.
- Connect the Report Server to OpenObserve.
- Generate a test report to confirm the setup.
- Schedule automated reports for recurring delivery.
By the end, you’ll have a working setup where dashboards are automatically captured as PDFs and sent to your inbox on schedule.
Prerequisites
Before starting, make sure you have:
- Docker installed.
- Ports free on your host: (You can host them on different port, but remember to update the port number everywhere)
- OpenObserve →
5080 - Report Server →
5090
- OpenObserve →
Step 1: Prepare Gmail SMTP Access
Gmail doesn’t let you use your normal password anymore for SMTP. You must use an App Password.
- Go to your Google Account → Security.
- Enable 2-Step Verification if not already.
- Under App passwords, create a new one.
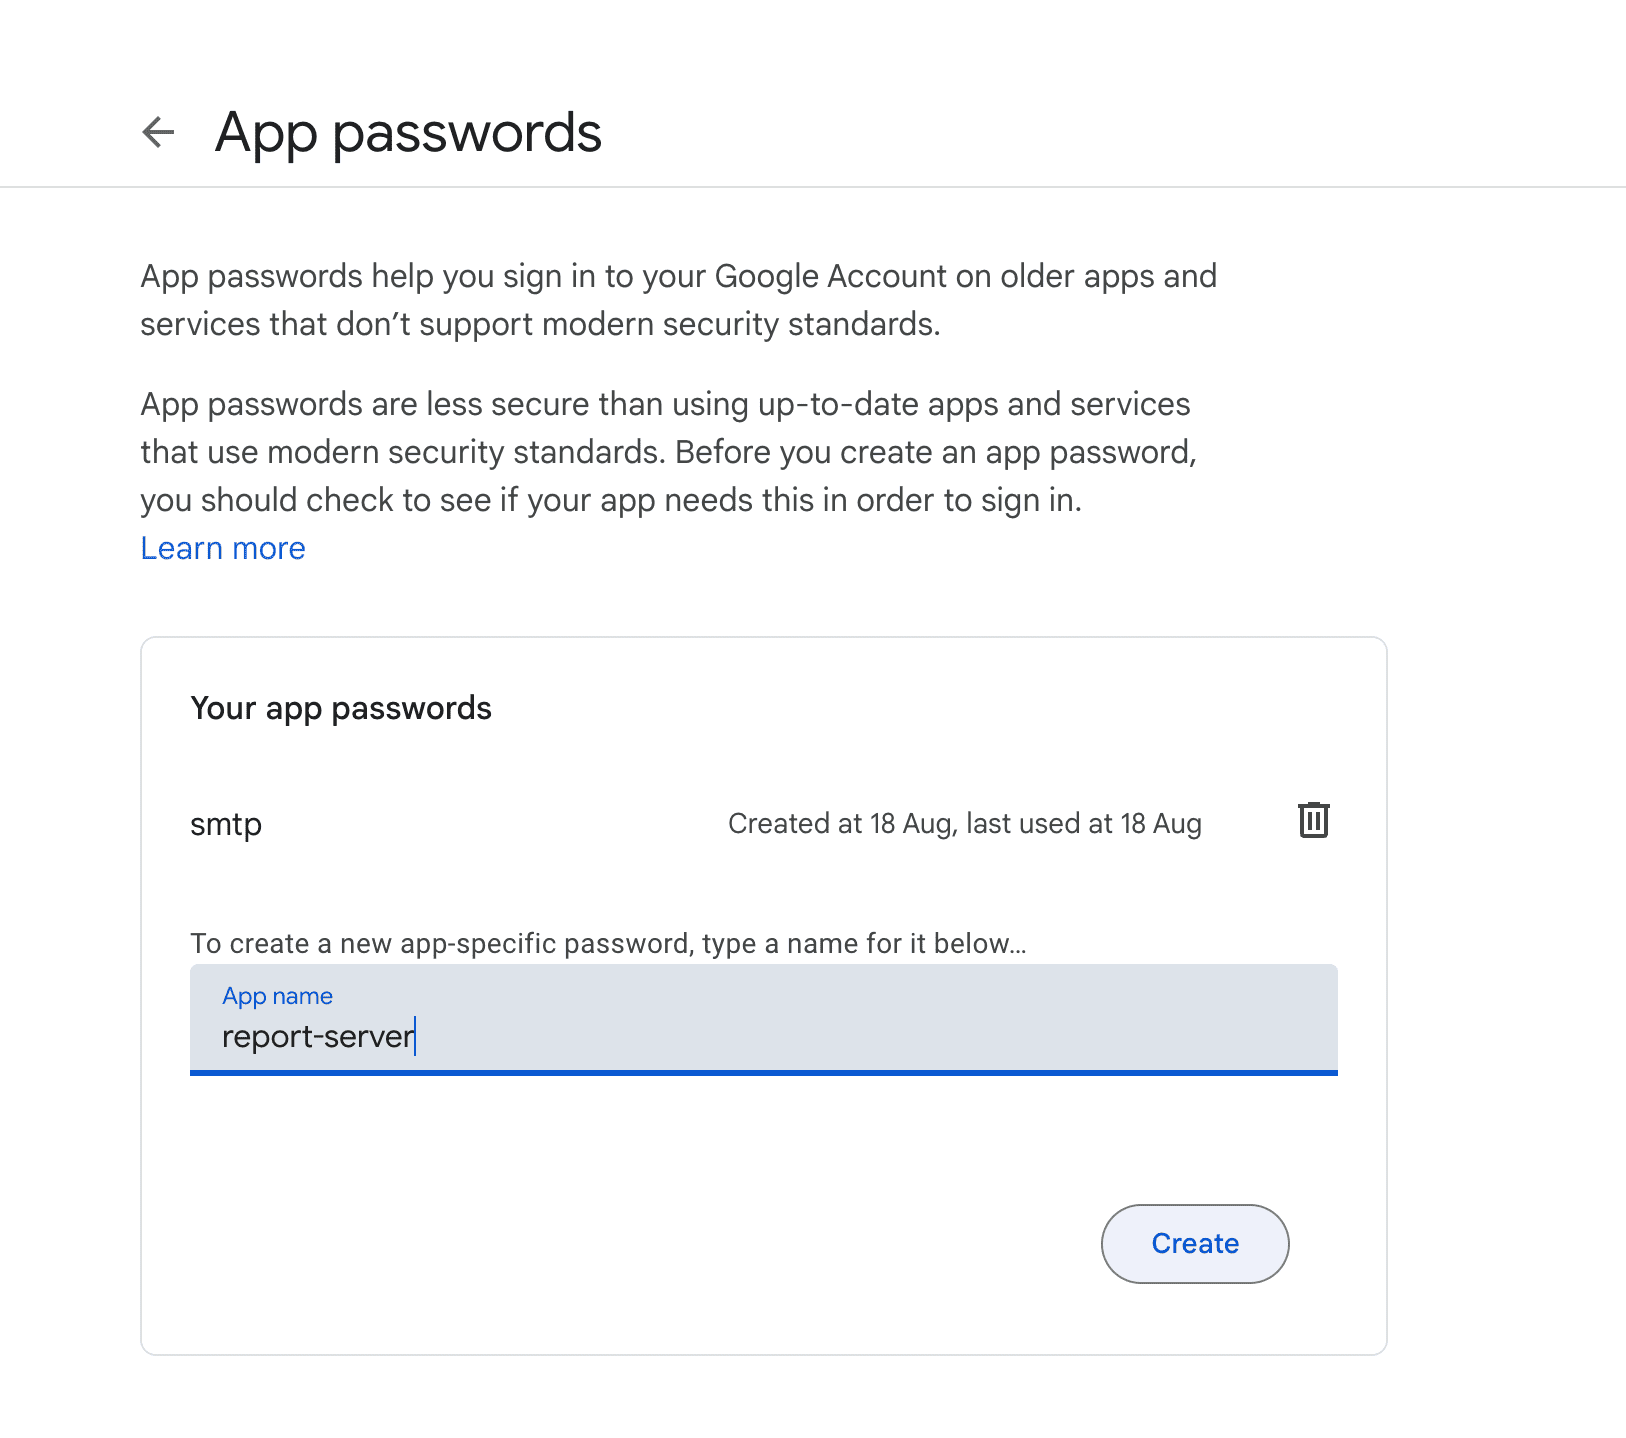
- Provide an app name, example
report-server - Google will generate a 16-character password like
abcd efgh ijkl mnop
Keep this safe, this is your ZO_SMTP_PASSWORD.
Step 2. Create a Docker Network
To enable communication between the report server container and the OpenObserve Container, we need to create a network.
docker network create o2-network
simrankumari@Simrans-MacBook-Pro ~ % docker network create oo-network
5221f4d6d677b168c55cda9ec3954665c78ebc81f280d322cad8c44bbf33cc78 simrankumari@Simrans-MacBook-Pro
Step 3. Run OpenObserve
Run OpenObserve Container using the command:
docker run -d --name openobserve \
  --network o2-network \
  -v $PWD/data:/data \
  -e ZO_DATA_DIR="/data" \
  -e ZO_ROOT_USER_EMAIL="root@example.com" \
  -e ZO_ROOT_USER_PASSWORD="Complexpass#123" \
  -e ZO_REPORT_SERVER_URL="http://report-server:5090" \
  -e ZO_WEB_URL="http://openobserve:5080" \
  -p 5080:5080 \
  o2cr.ai/openobserve/openobserve-enterprise:latest
You can find OSS and enterprise versions of OpenObserve on the OpenObserve downloads page.
Step 4: Run Report Server with Gmail SMTP ENV
- Run the Report server using:
docker run -d --name report-server \
  --network o2-network \
  -p 5090:5090 \
  -e ZO_REPORT_USER_EMAIL="root@example.com" \
  -e ZO_REPORT_USER_PASSWORD="Complexpass#123" \
  -e ZO_HTTP_ADDR="0.0.0.0" \
  -e ZO_HTTP_PORT=5090 \
  -e ZO_SMTP_HOST="smtp.gmail.com" \
  -e ZO_SMTP_PORT=465 \
  -e ZO_SMTP_USER_NAME="yourgmail@gmail.com" \
  -e ZO_SMTP_PASSWORD="your app password" \
  -e ZO_SMTP_FROM_EMAIL="yourgmail@gmail.com" \
  -e ZO_SMTP_ENCRYPTION="ssltls" \
  -e ZO_CHROME_NO_SANDBOX=true \
  public.ecr.aws/zinclabs/report-server:v0.11.0-4ab788d
⚠️ Notes:
- If you prefer STARTTLS instead of SSL → use port
587andZO_SMTP_ENCRYPTION=starttls. ZO_SMTP_USER_NAMEandZO_SMTP_FROM_EMAILmust be the same Gmail ID.- Keep your app password secret, don’t paste normal Gmail password.
You can look for the latest version of the report server here, and update the image tag in the docker command accordingly.
- Check docker logs to confirm the server is running fine.
docker logs -f report-server

Step 5: Create a Dashboard
To test out the report server, you need to try out sending some data to OpenObserve and creating a dashboard out of it. Follow these steps:
- Login to your OpenObserve server and move to DataSources → Custom → Curl
- Copy the curl requests and use it to send some records in default stream
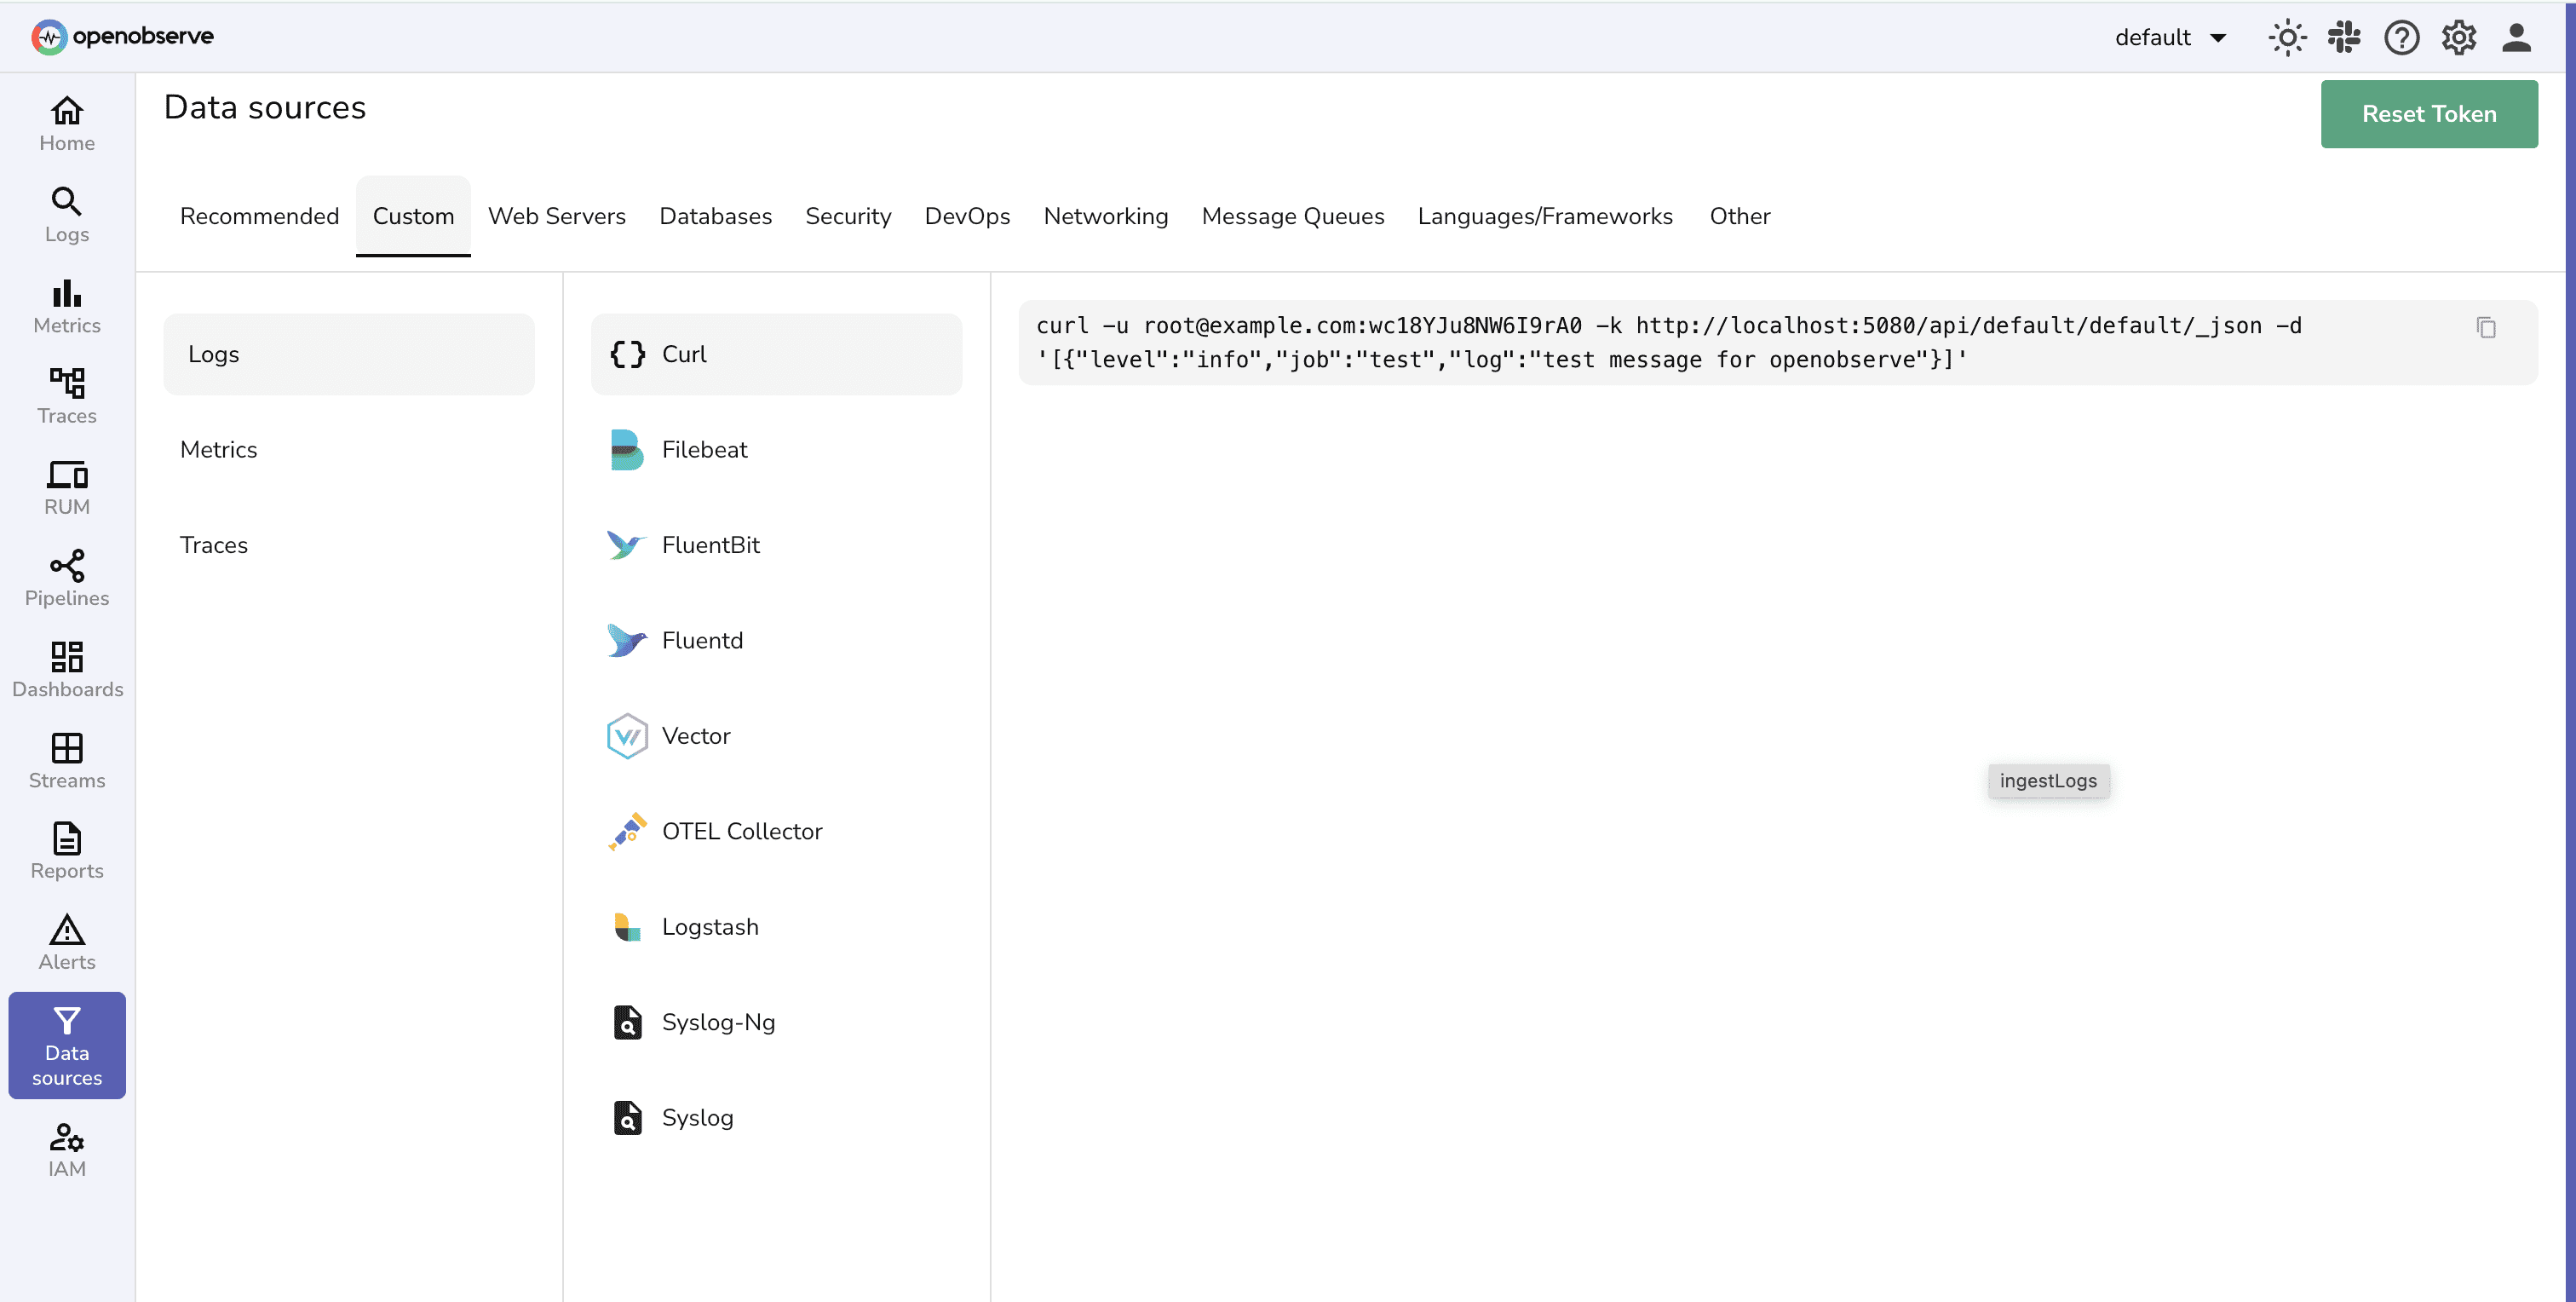

- Create a Dashboard:
- Move to Dashboard → New Dashboard → Create Dashboard
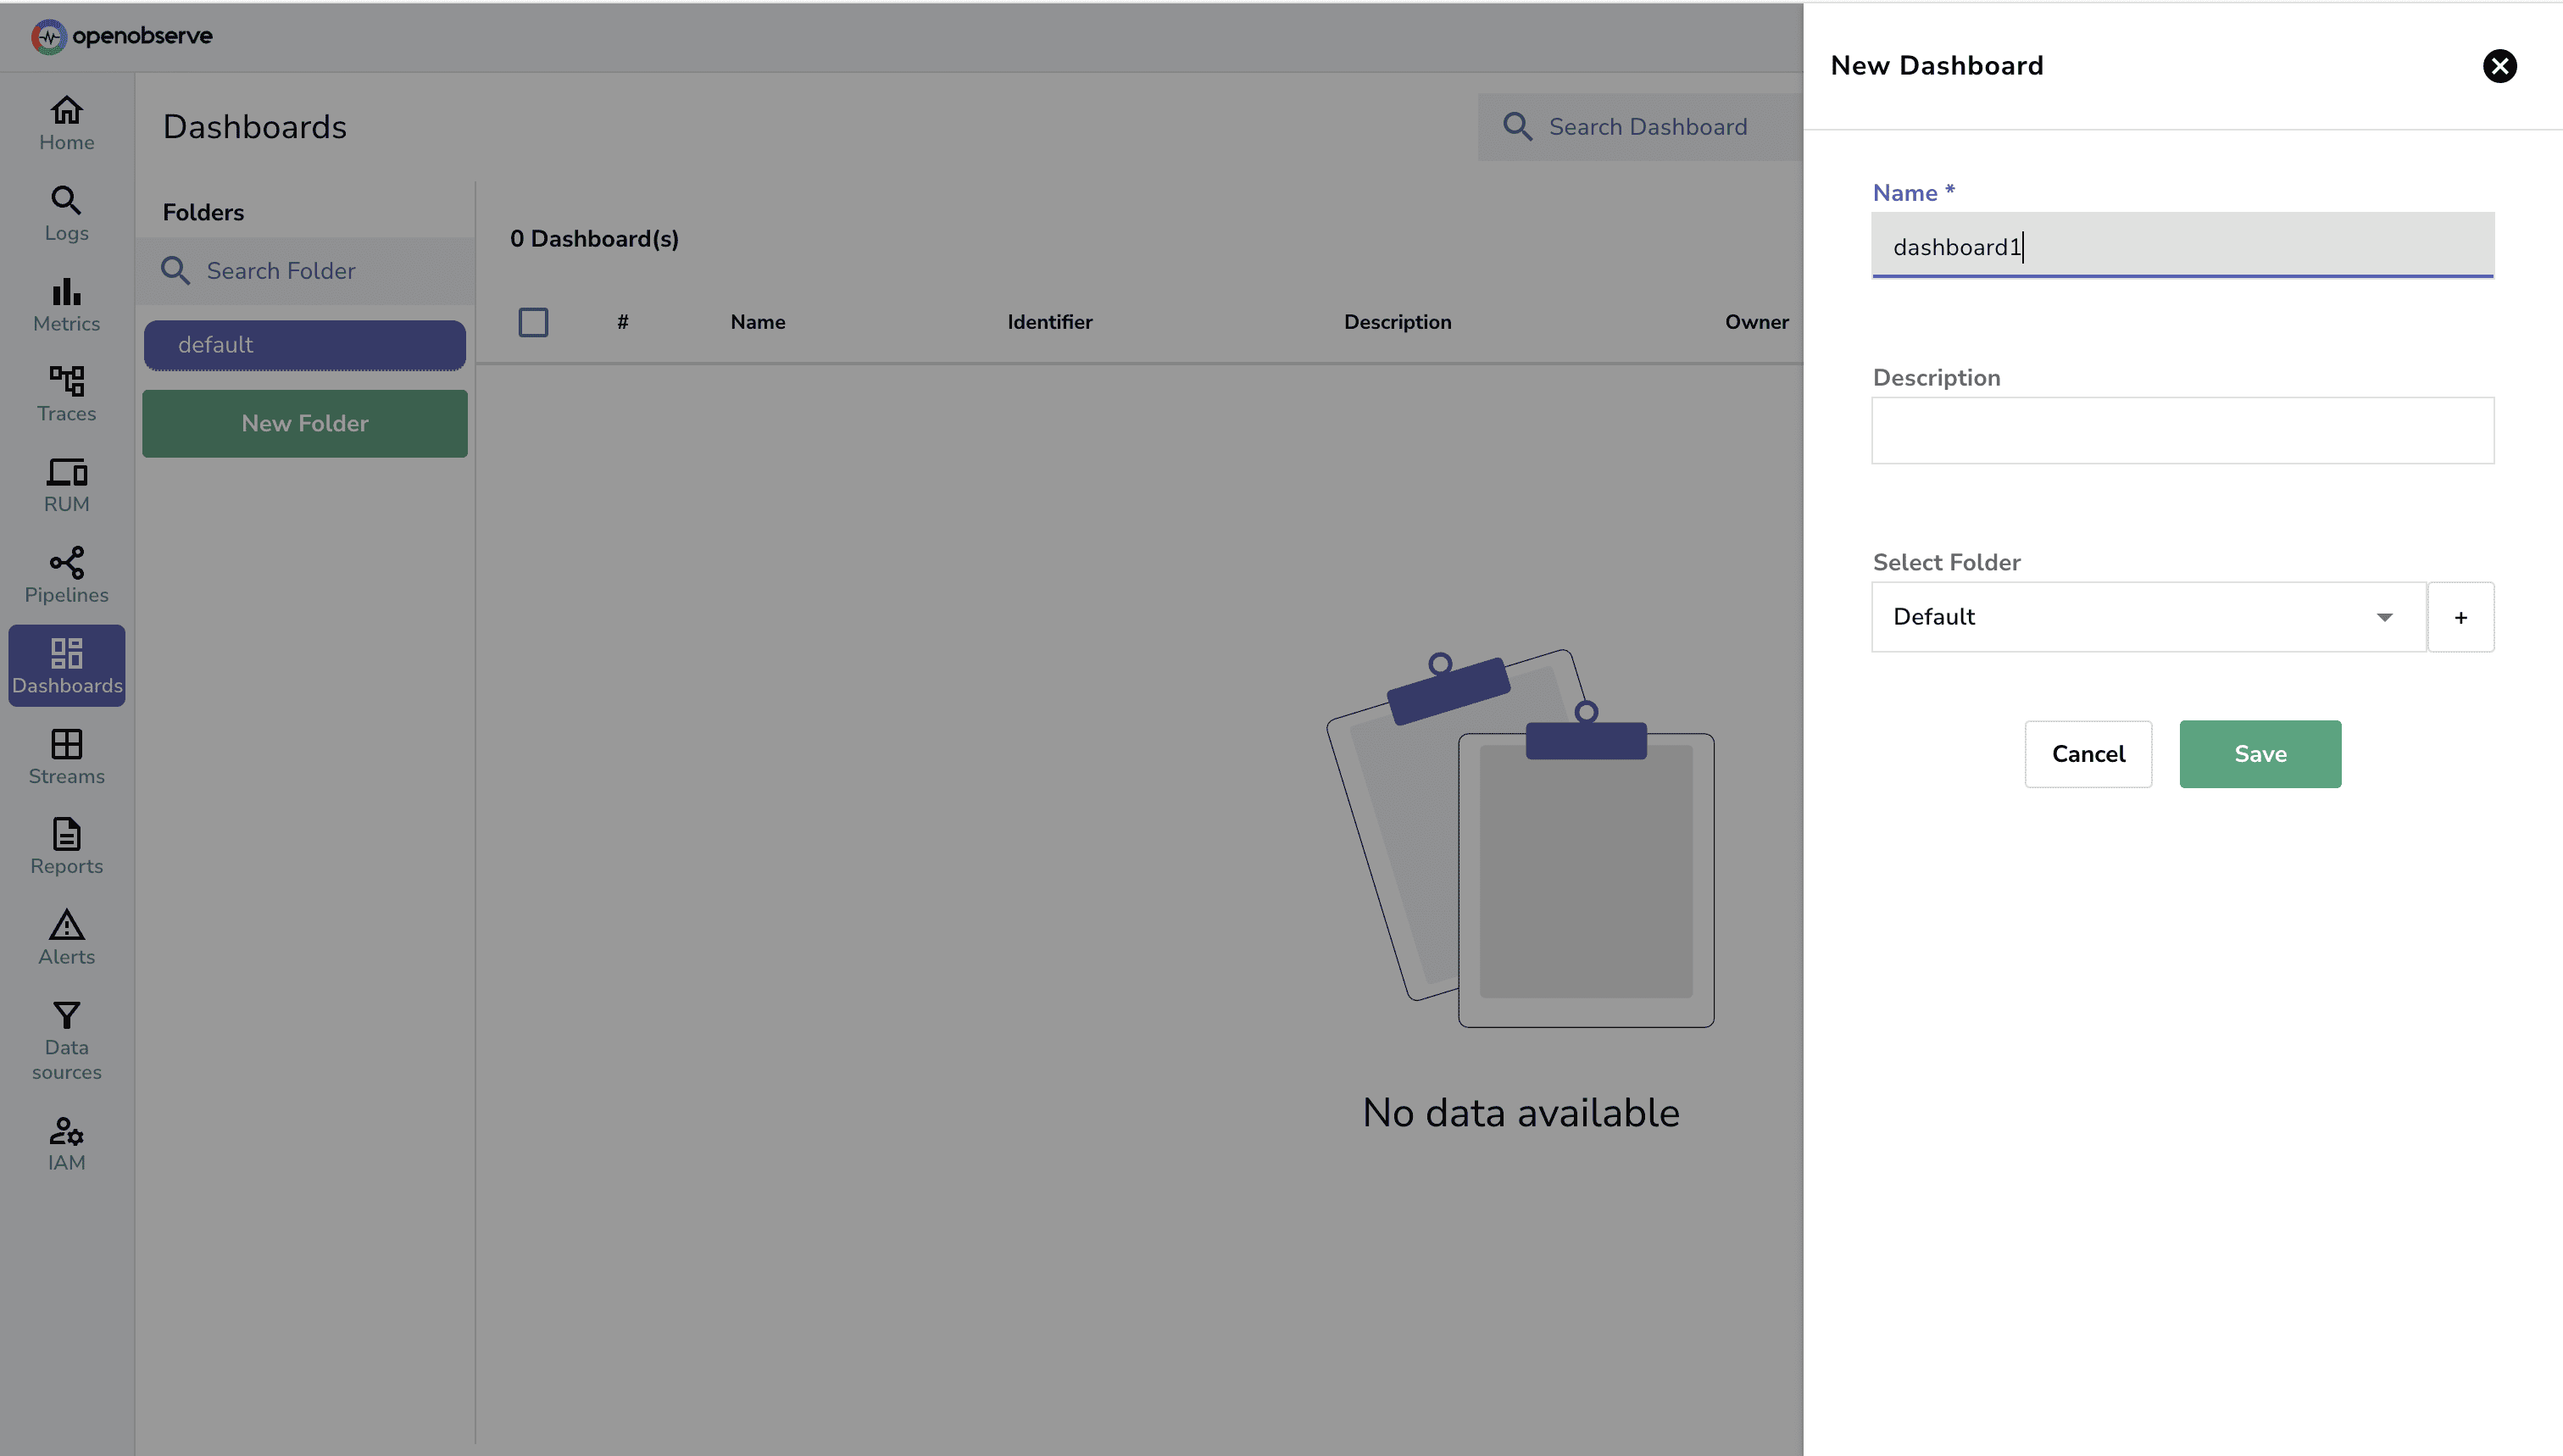
- Add Panel → Create a simple panel for testing
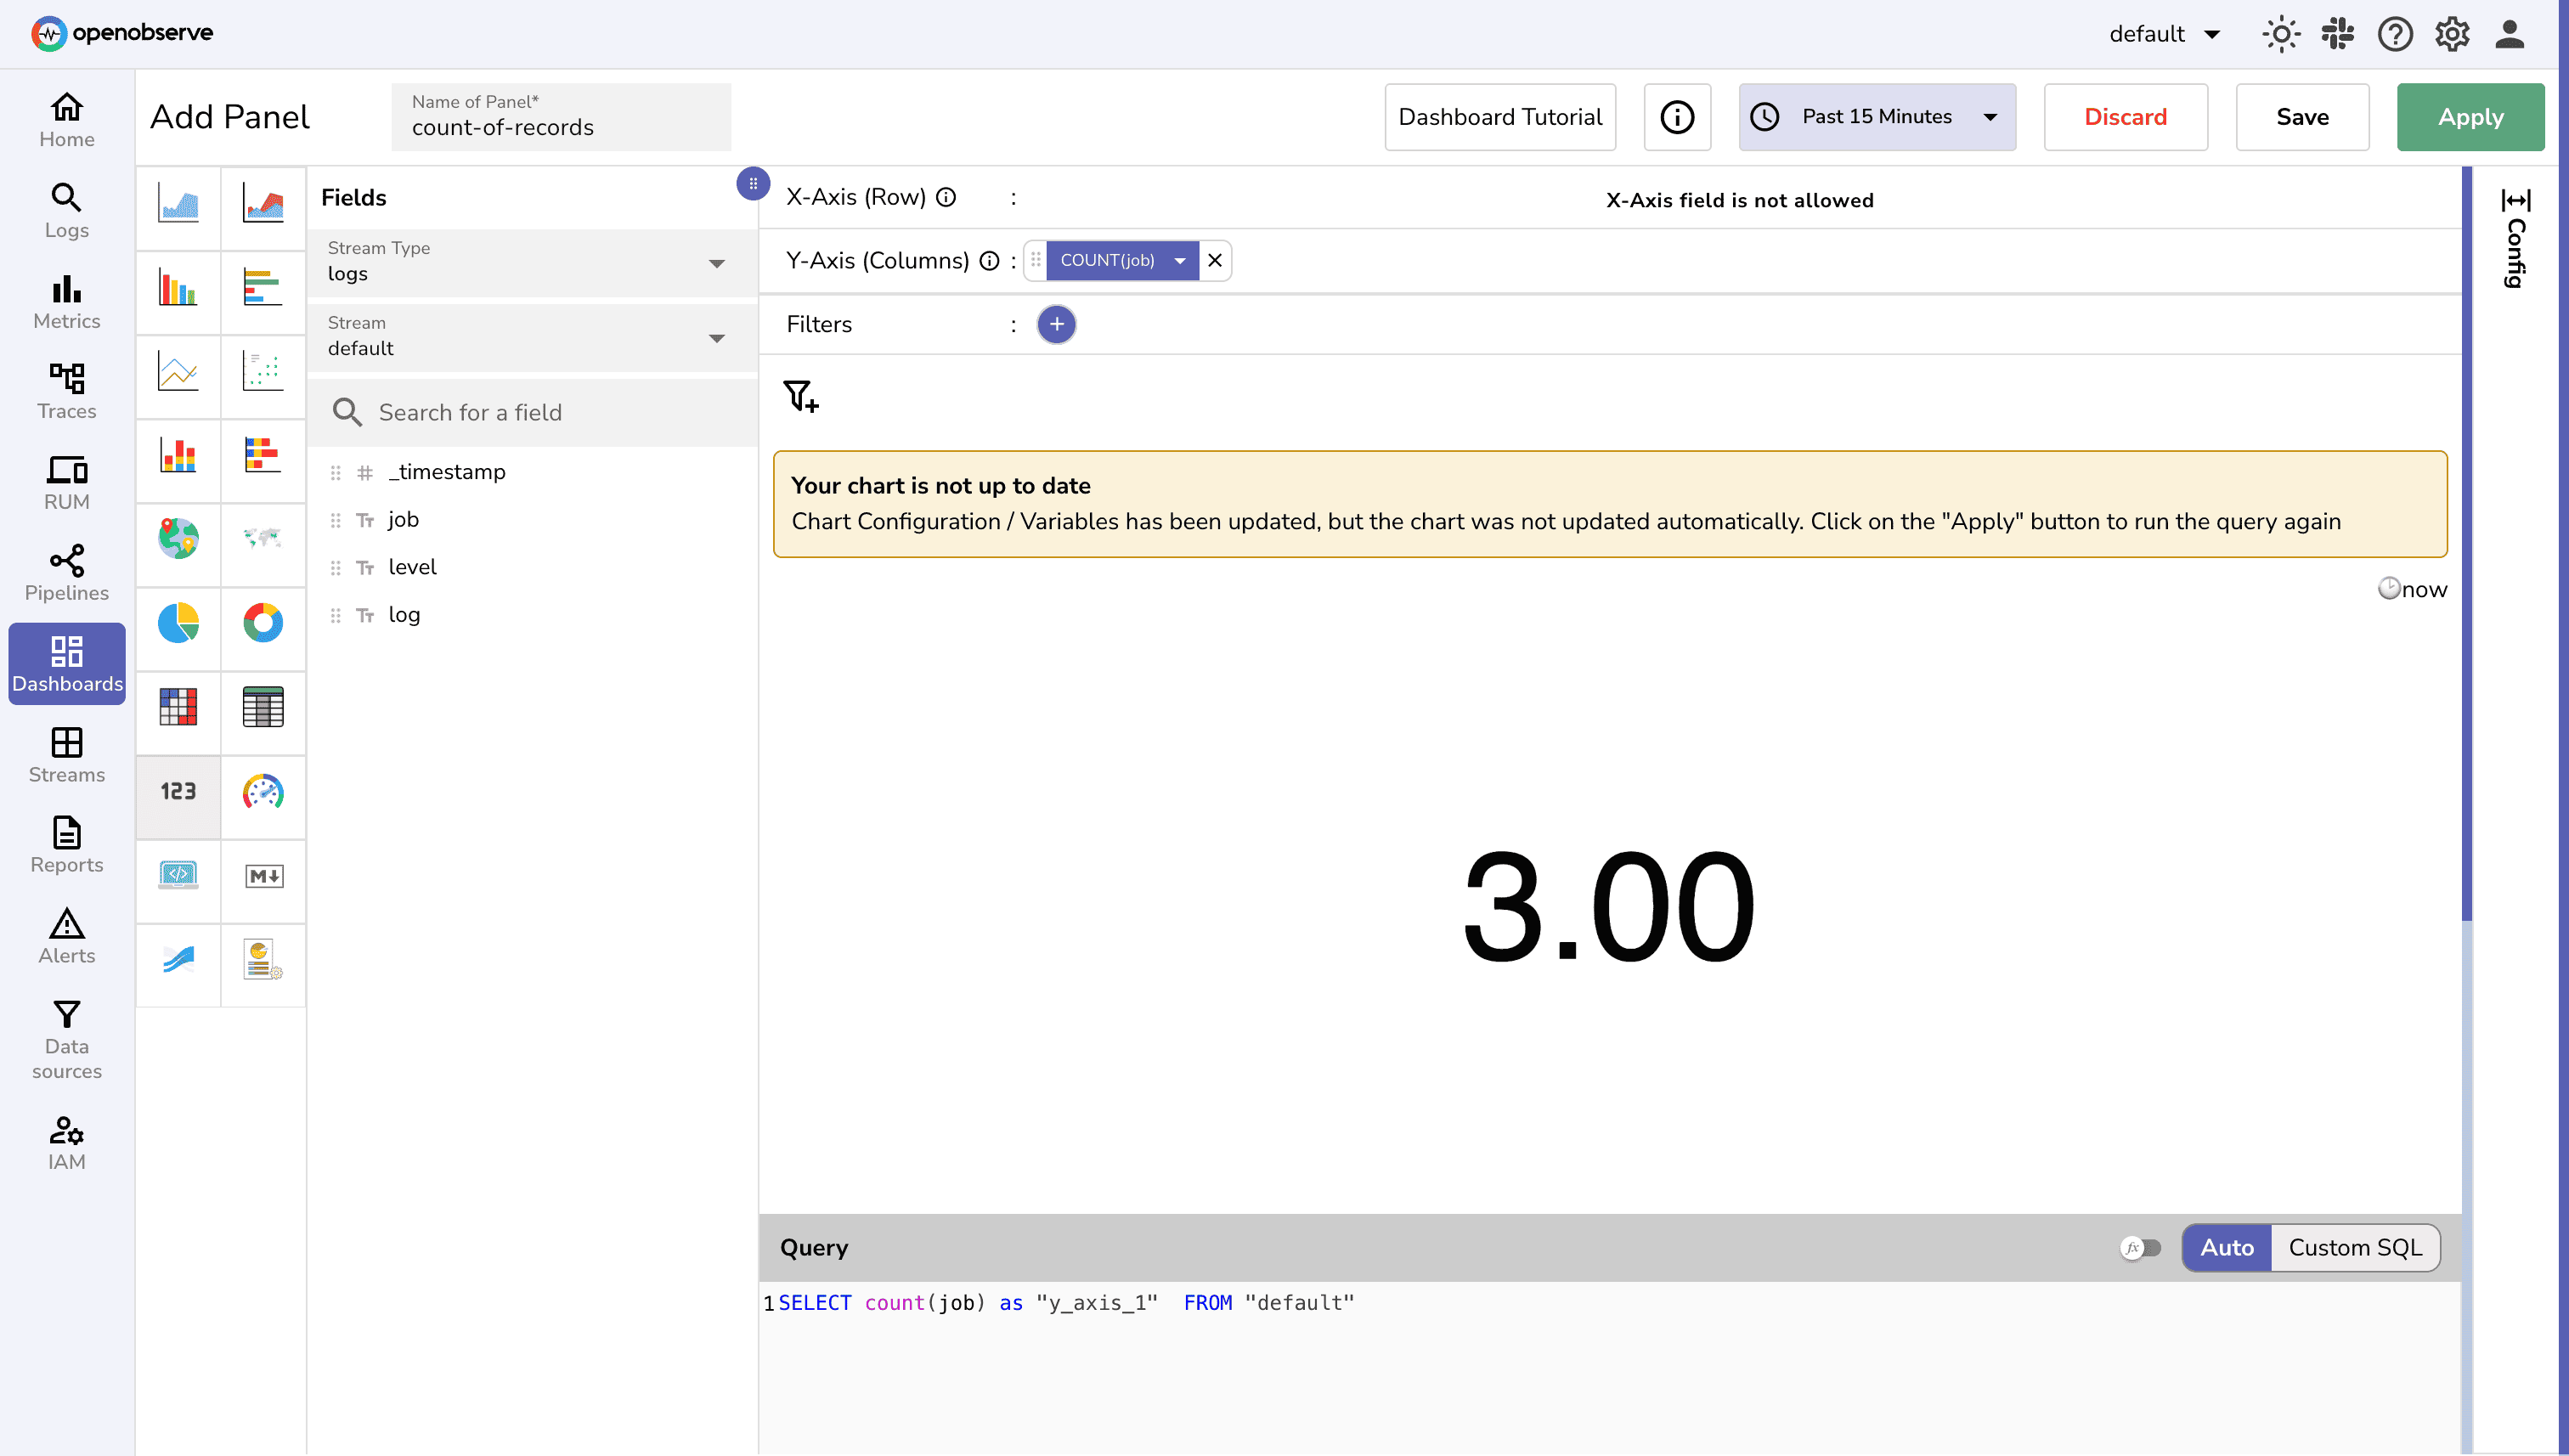
- Save the Dashboard
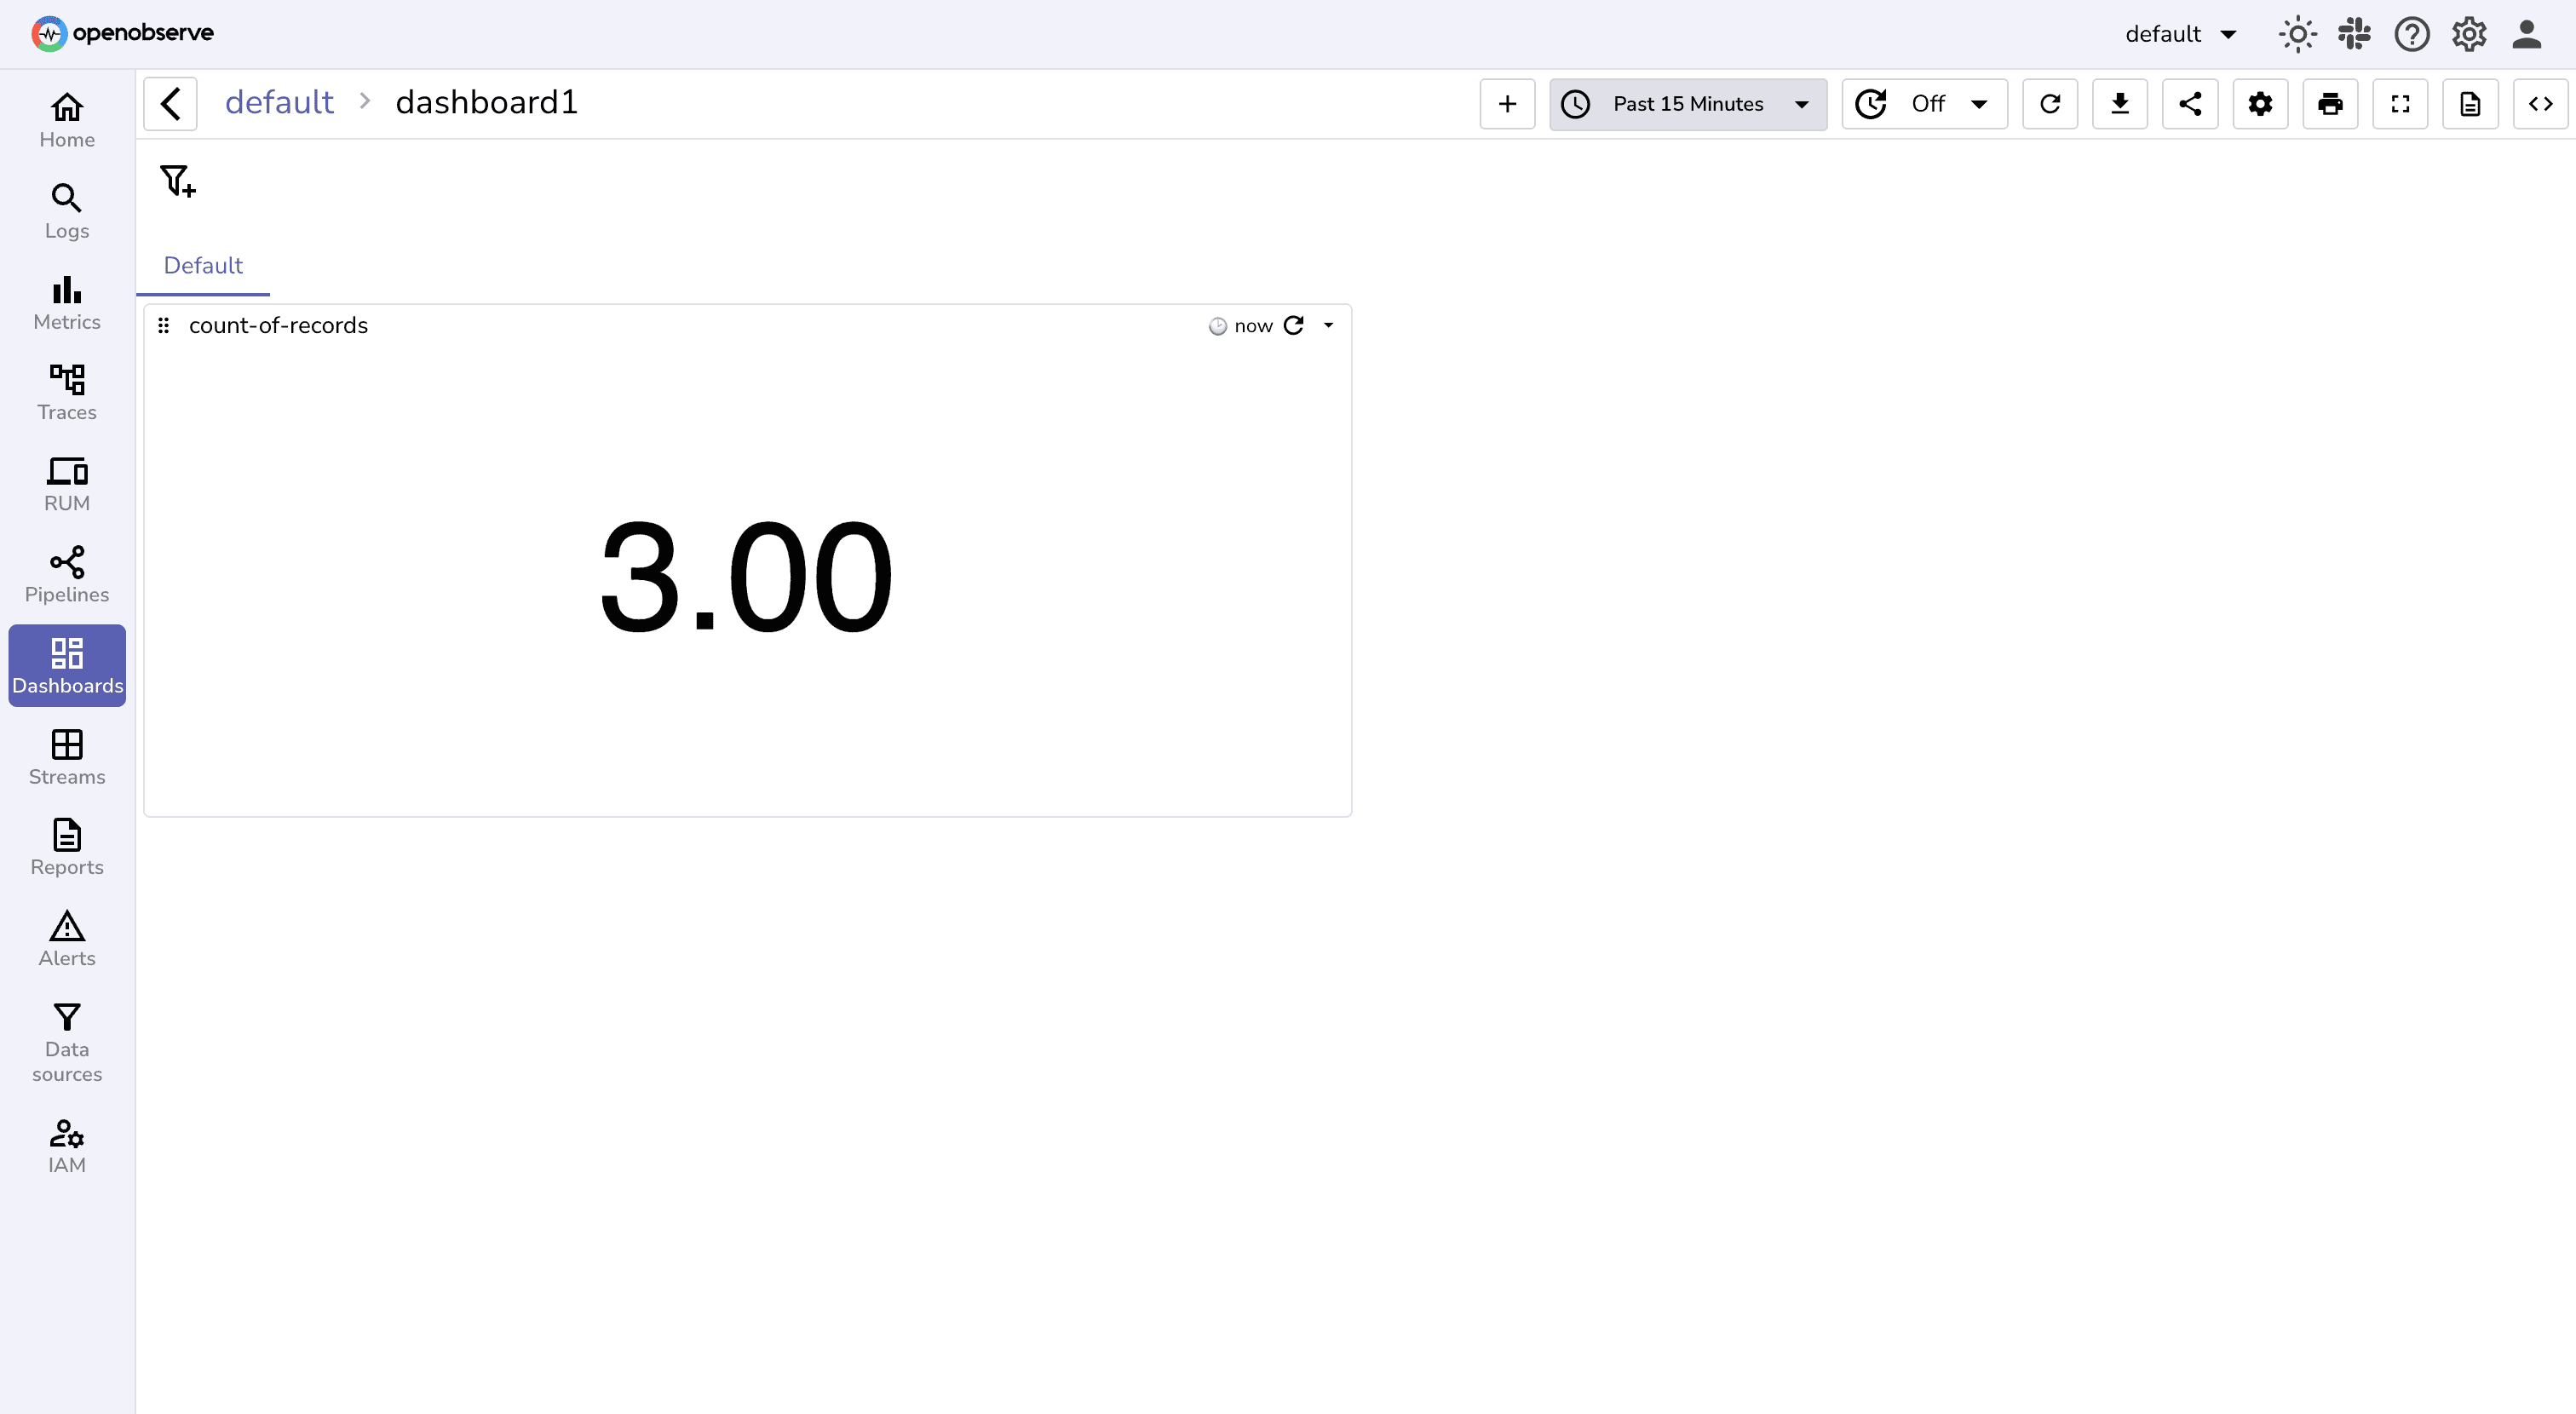
Step 6: Create a Report
Next to trigger reports, you need to create one.
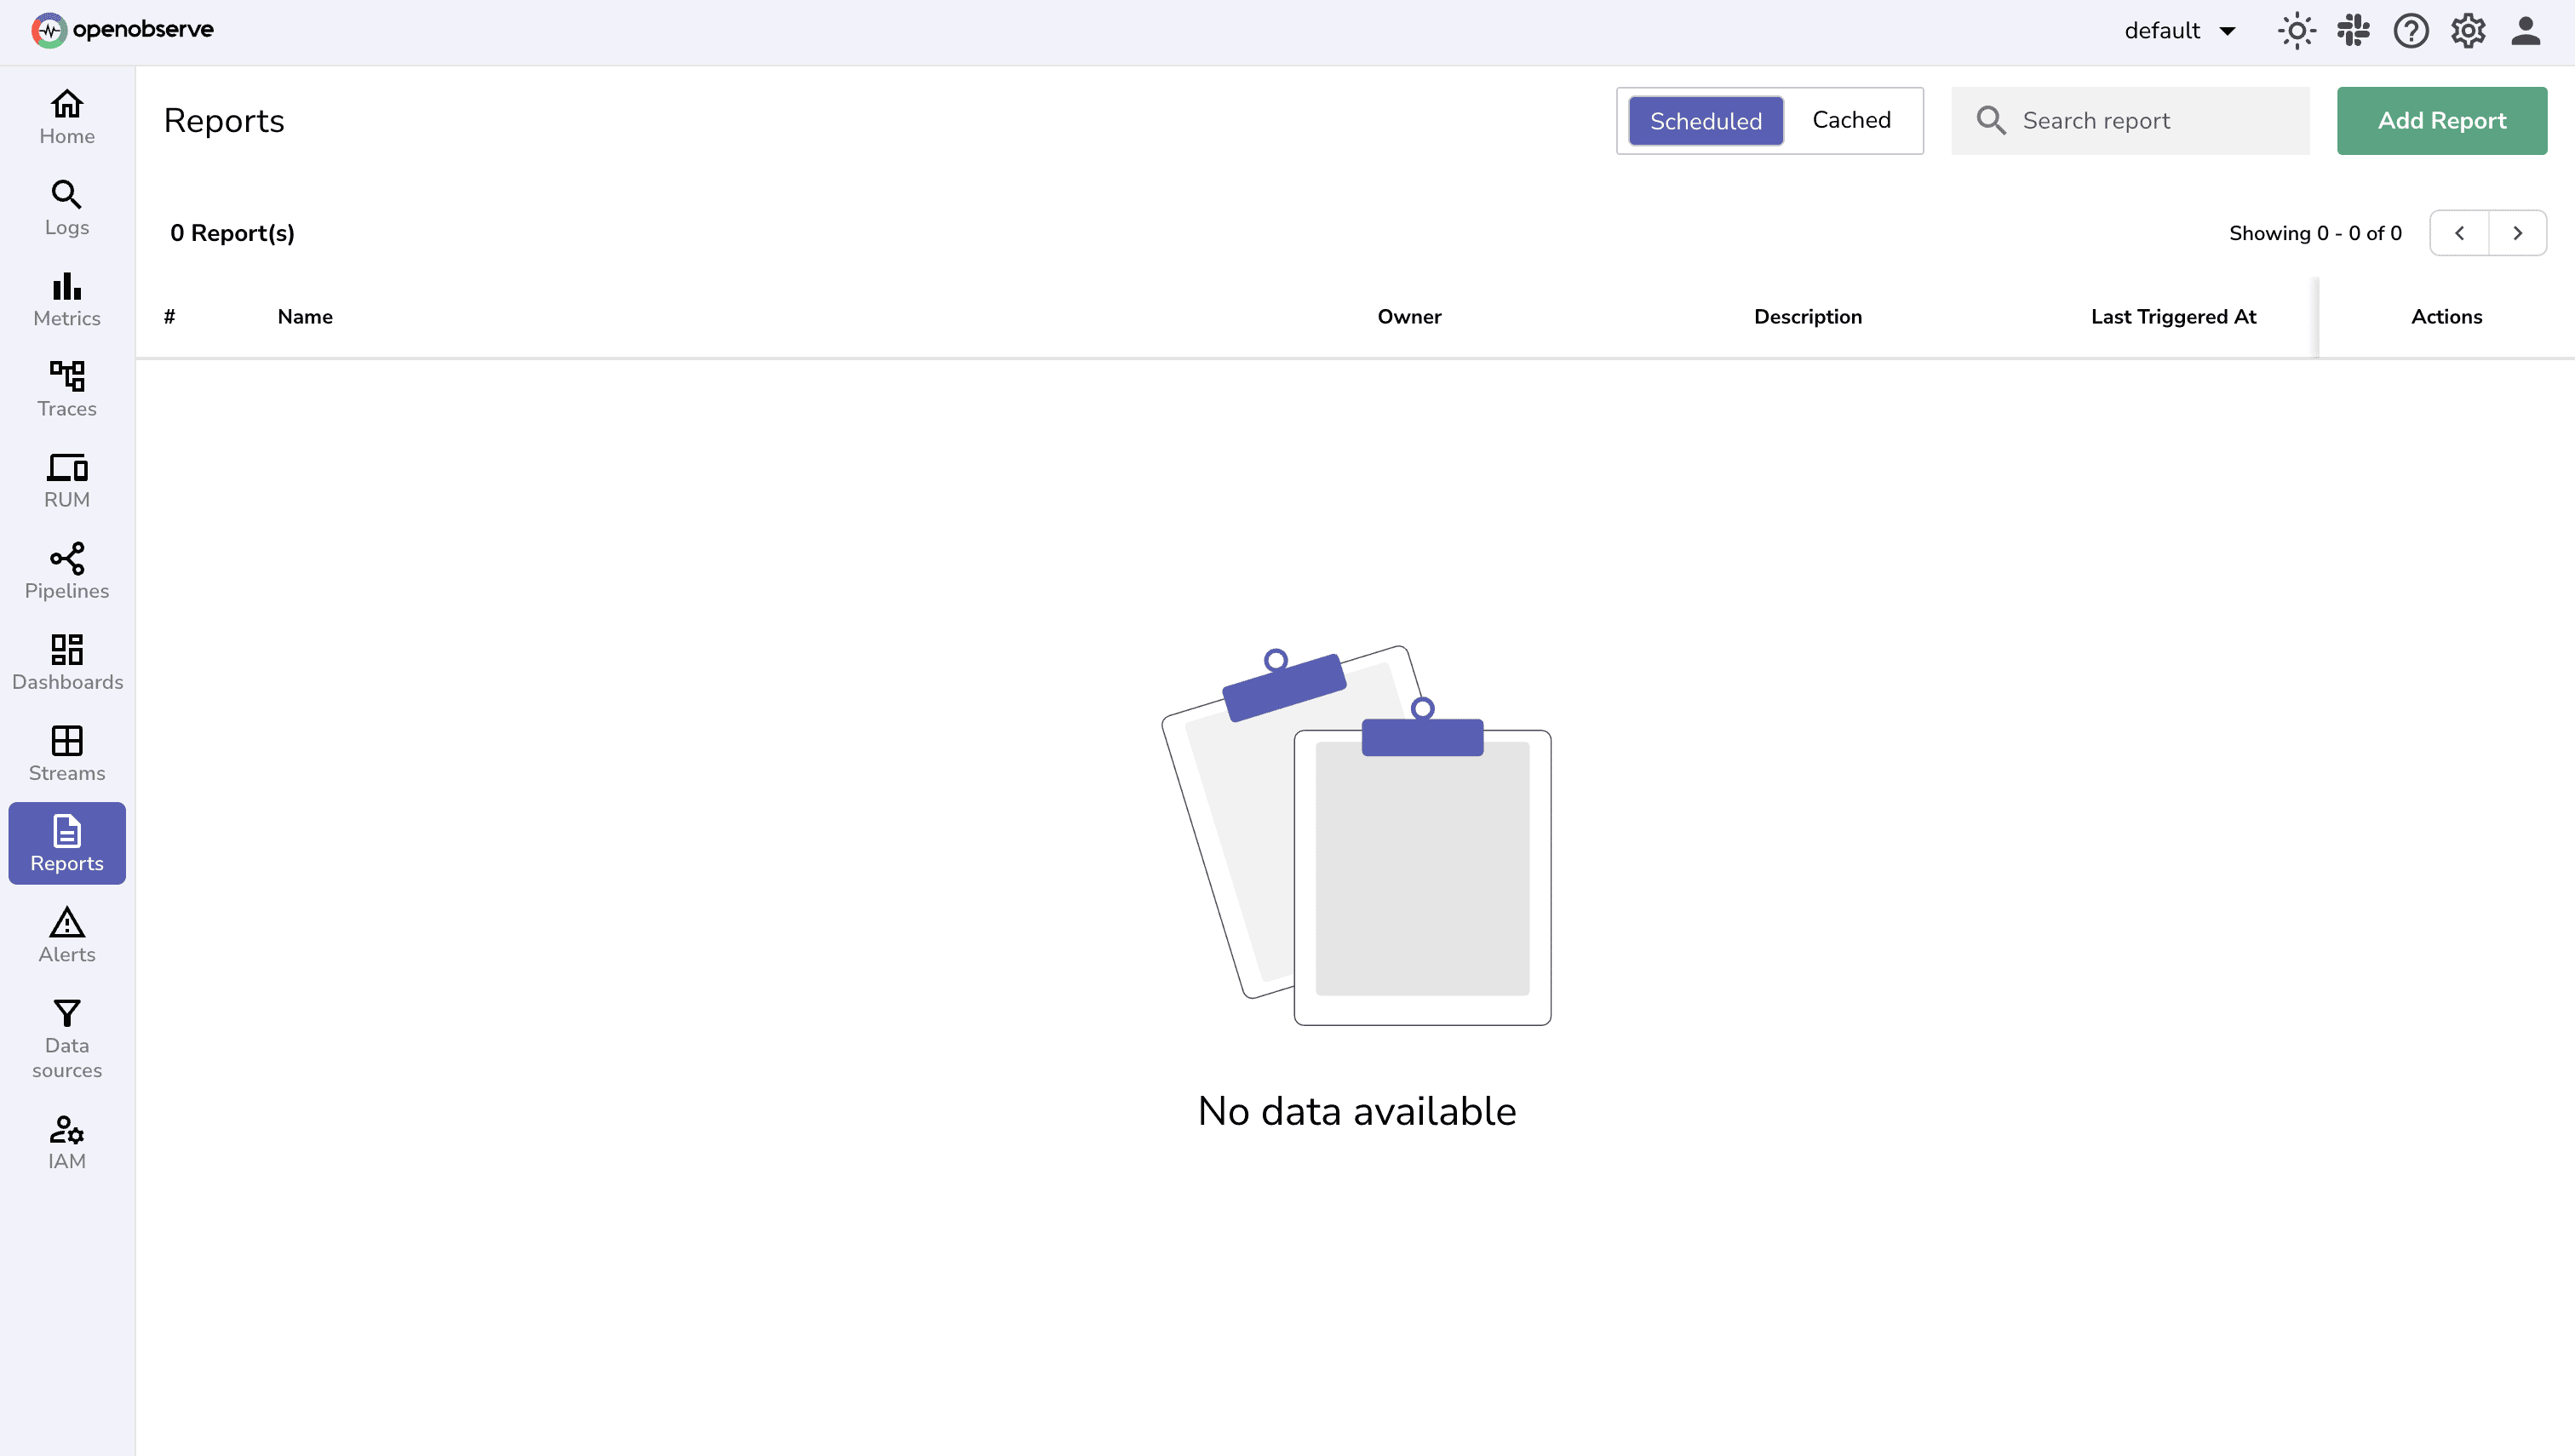
- Move to Reports tab in the UI → Add Report.
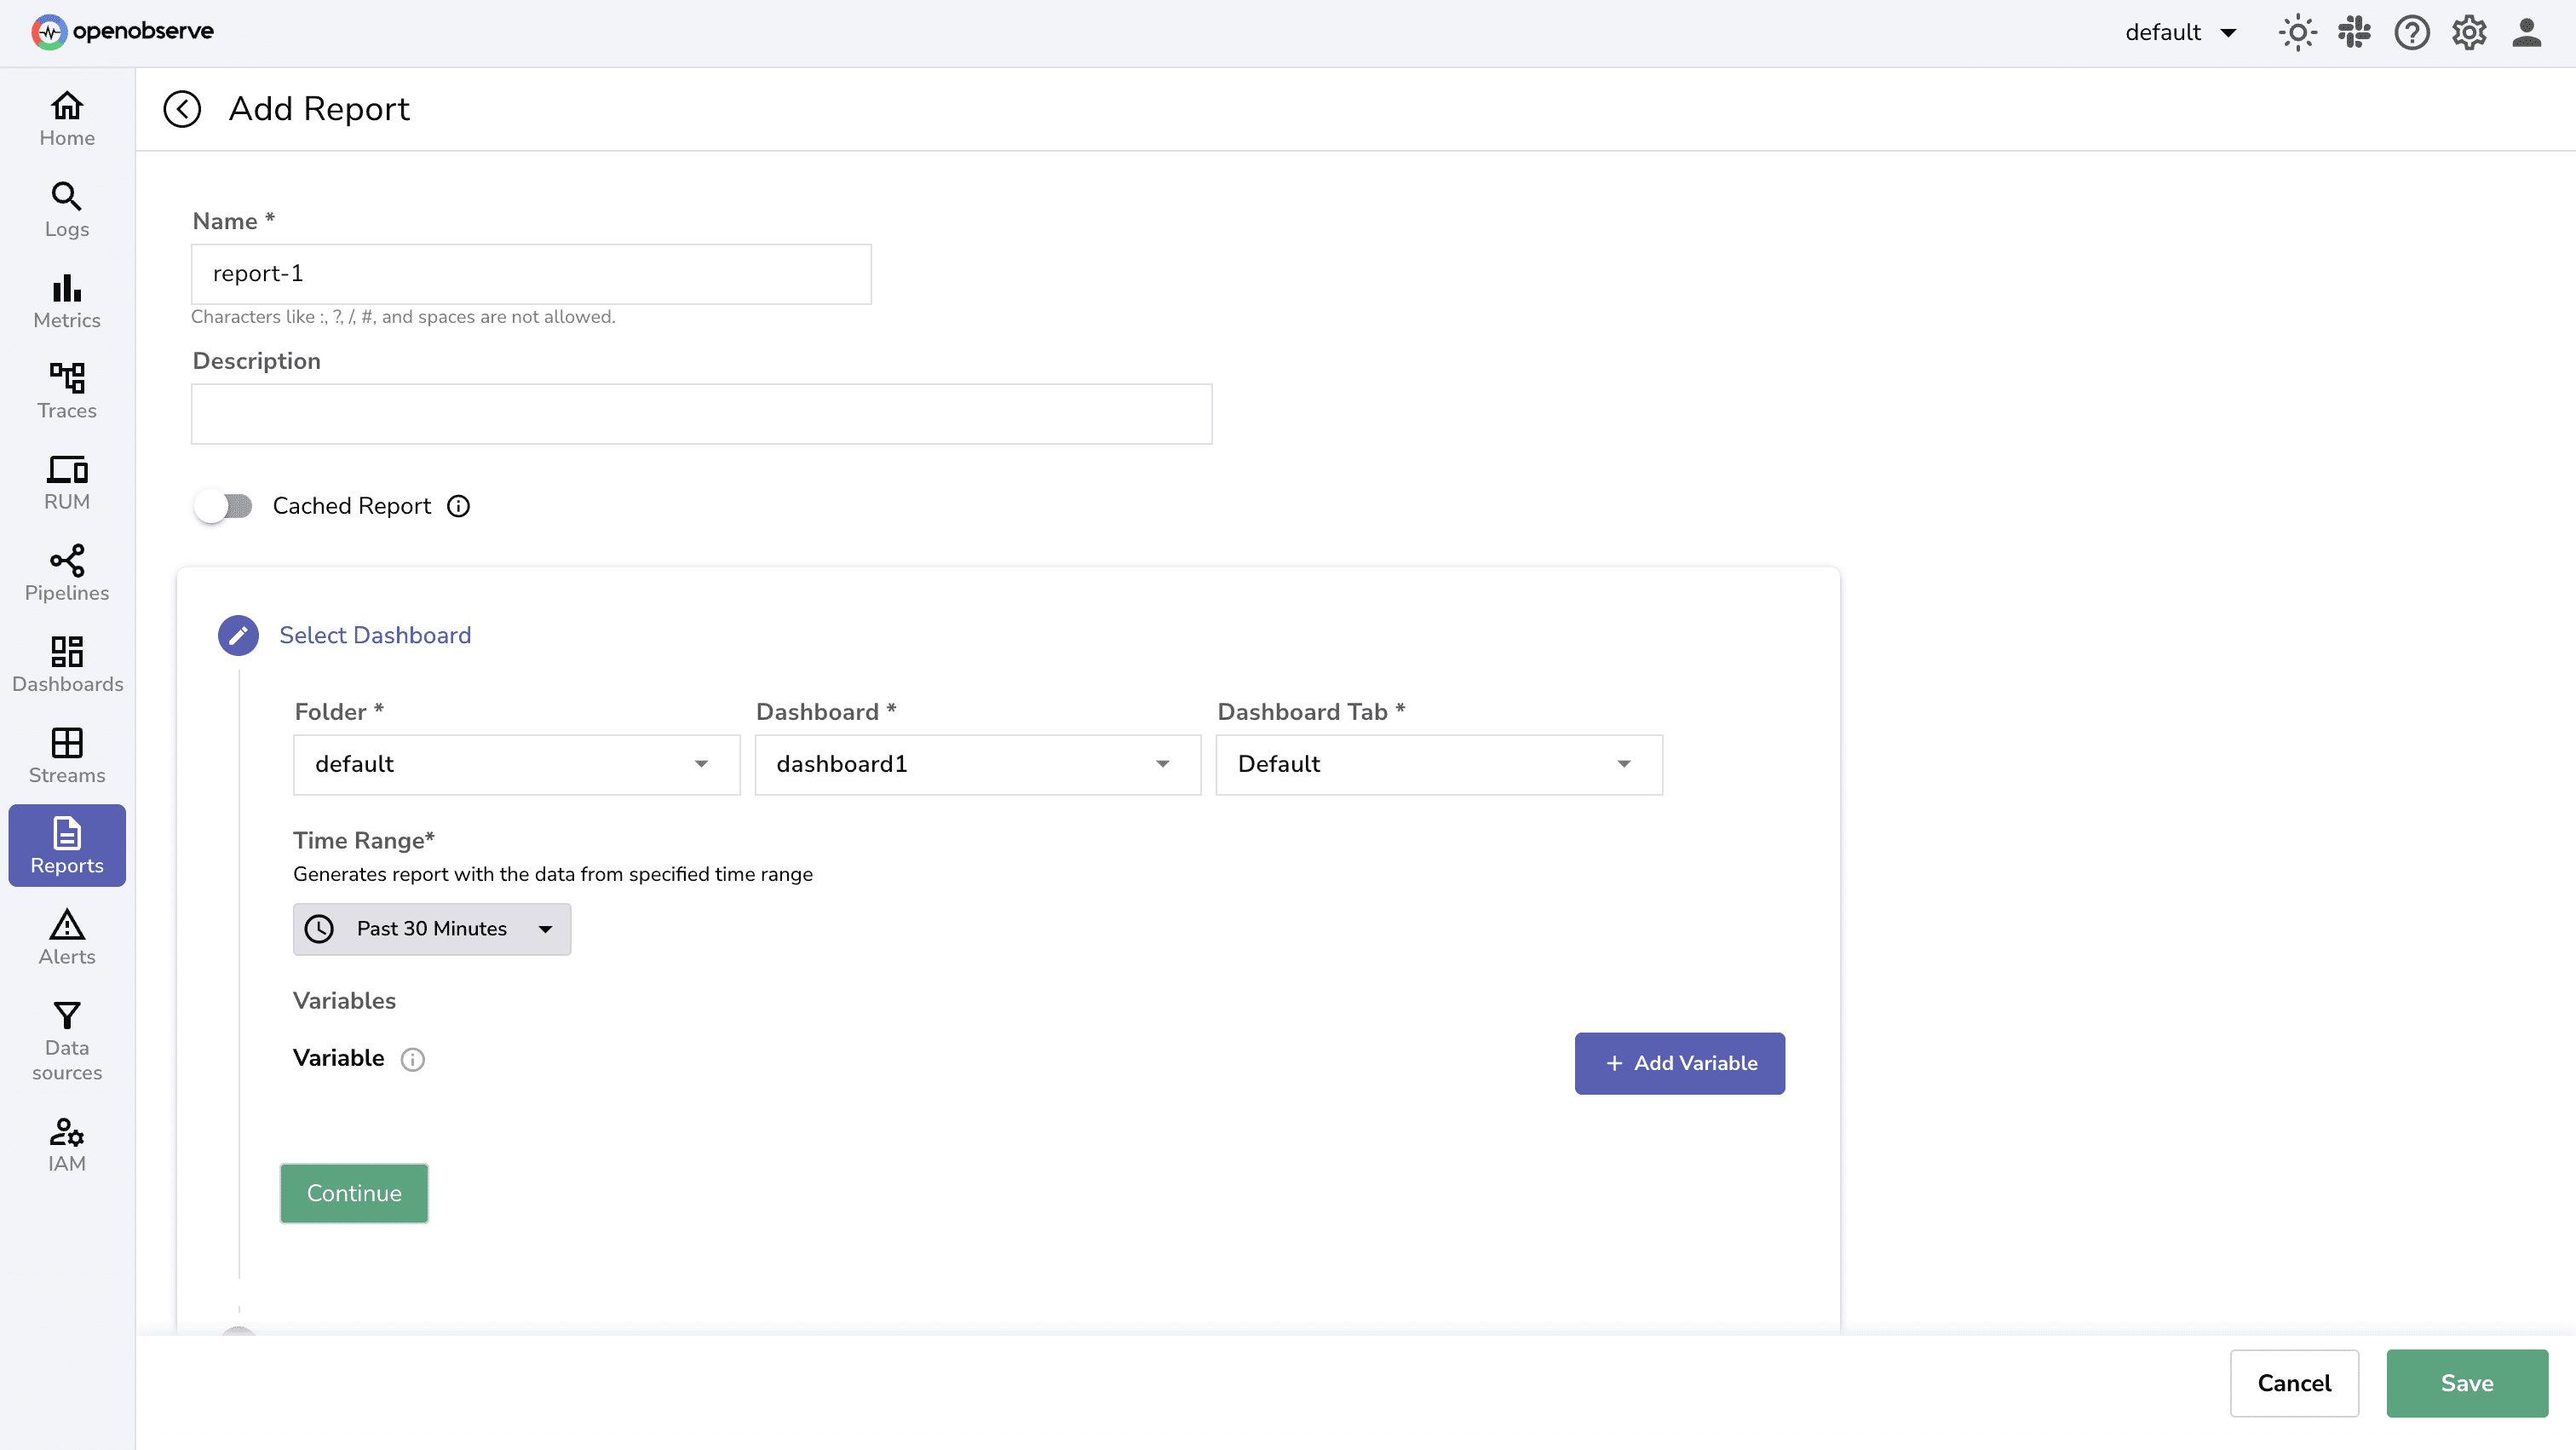
- Select the Dashboard details for which you want to create a report.
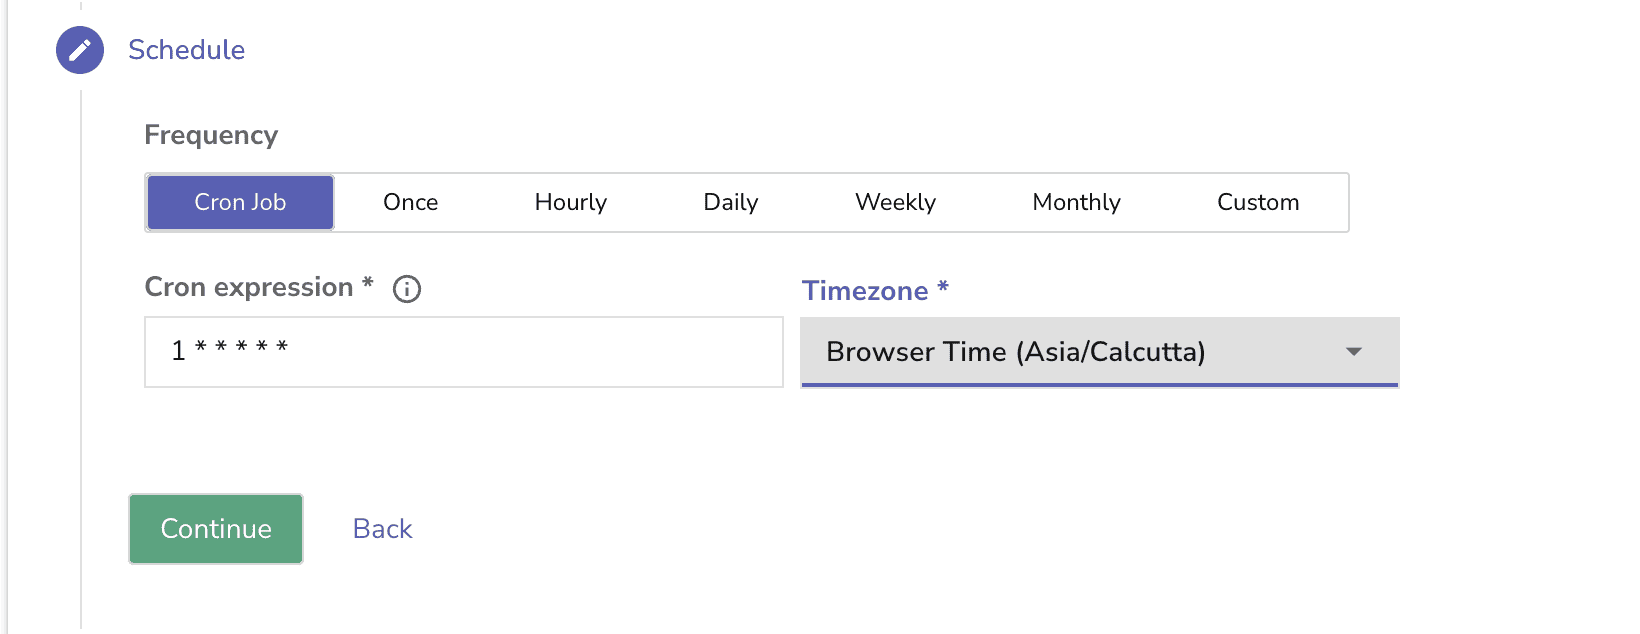
- Set the report frequency based on your need. For example, the one below runs every minute.
- Provide the title , body and recipient emails.
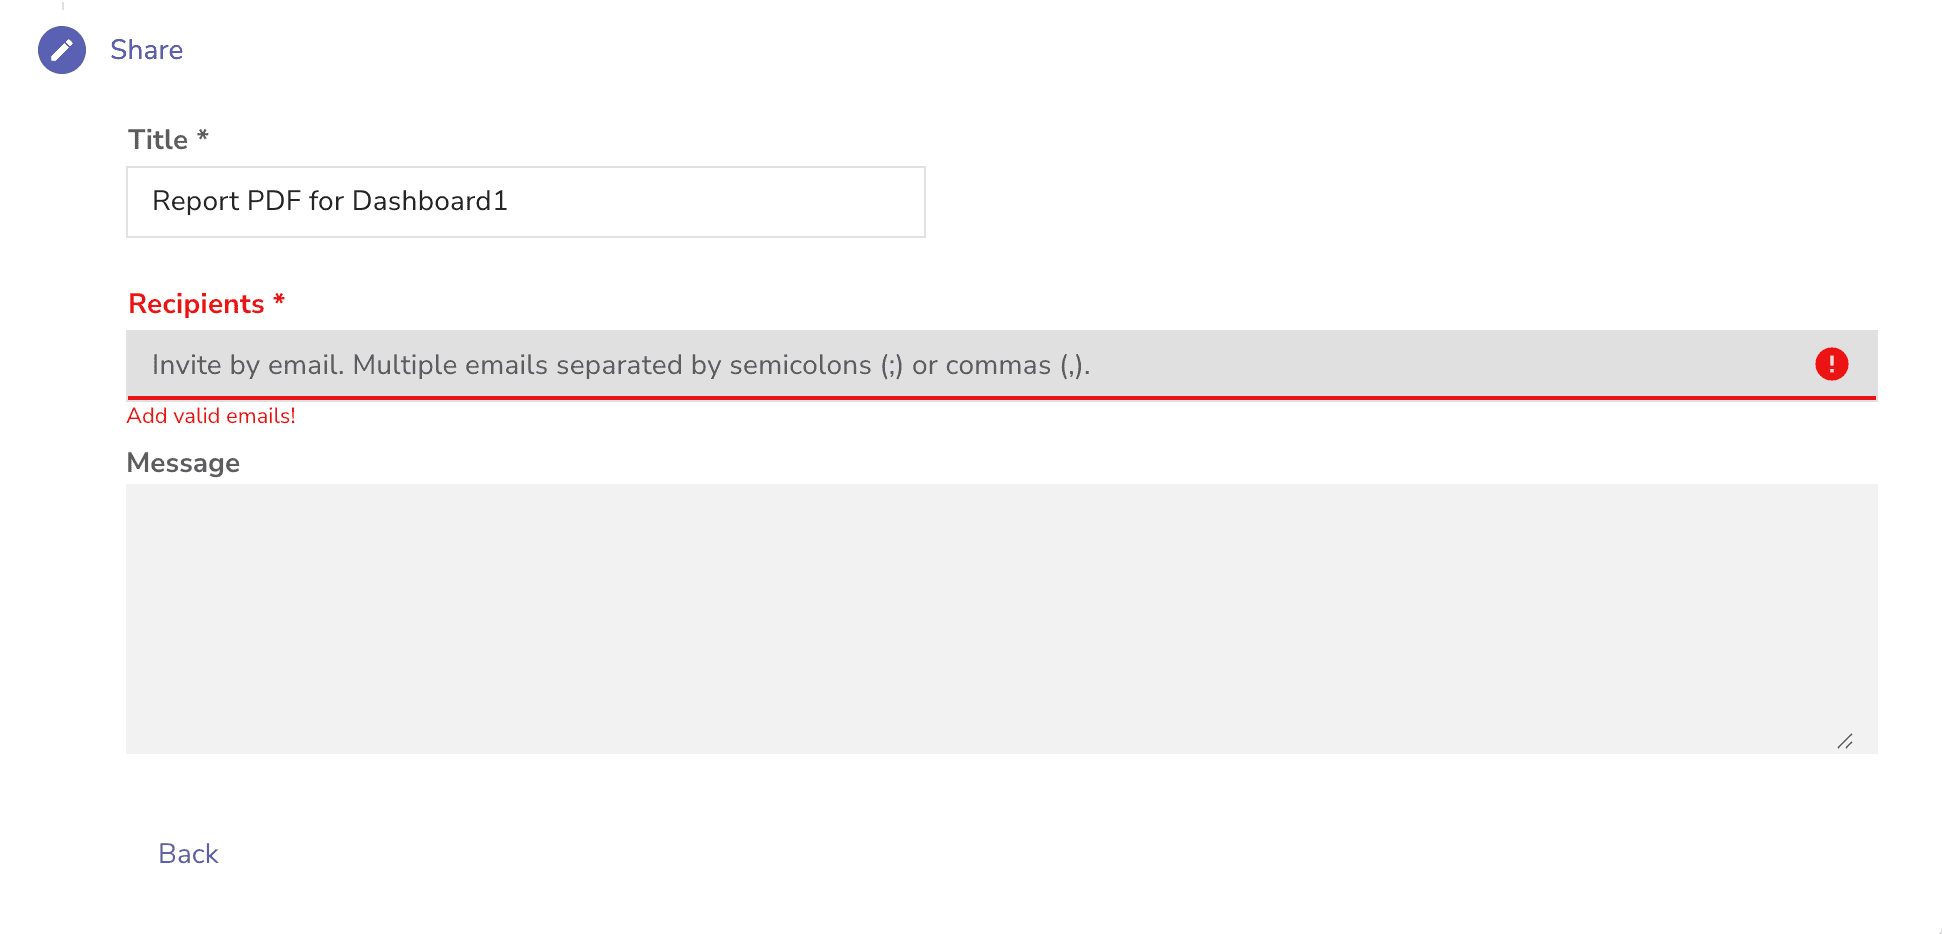
Report body supports Markdown formatting. Reports are not stored permanently in Report Server; they’re generated on demand.
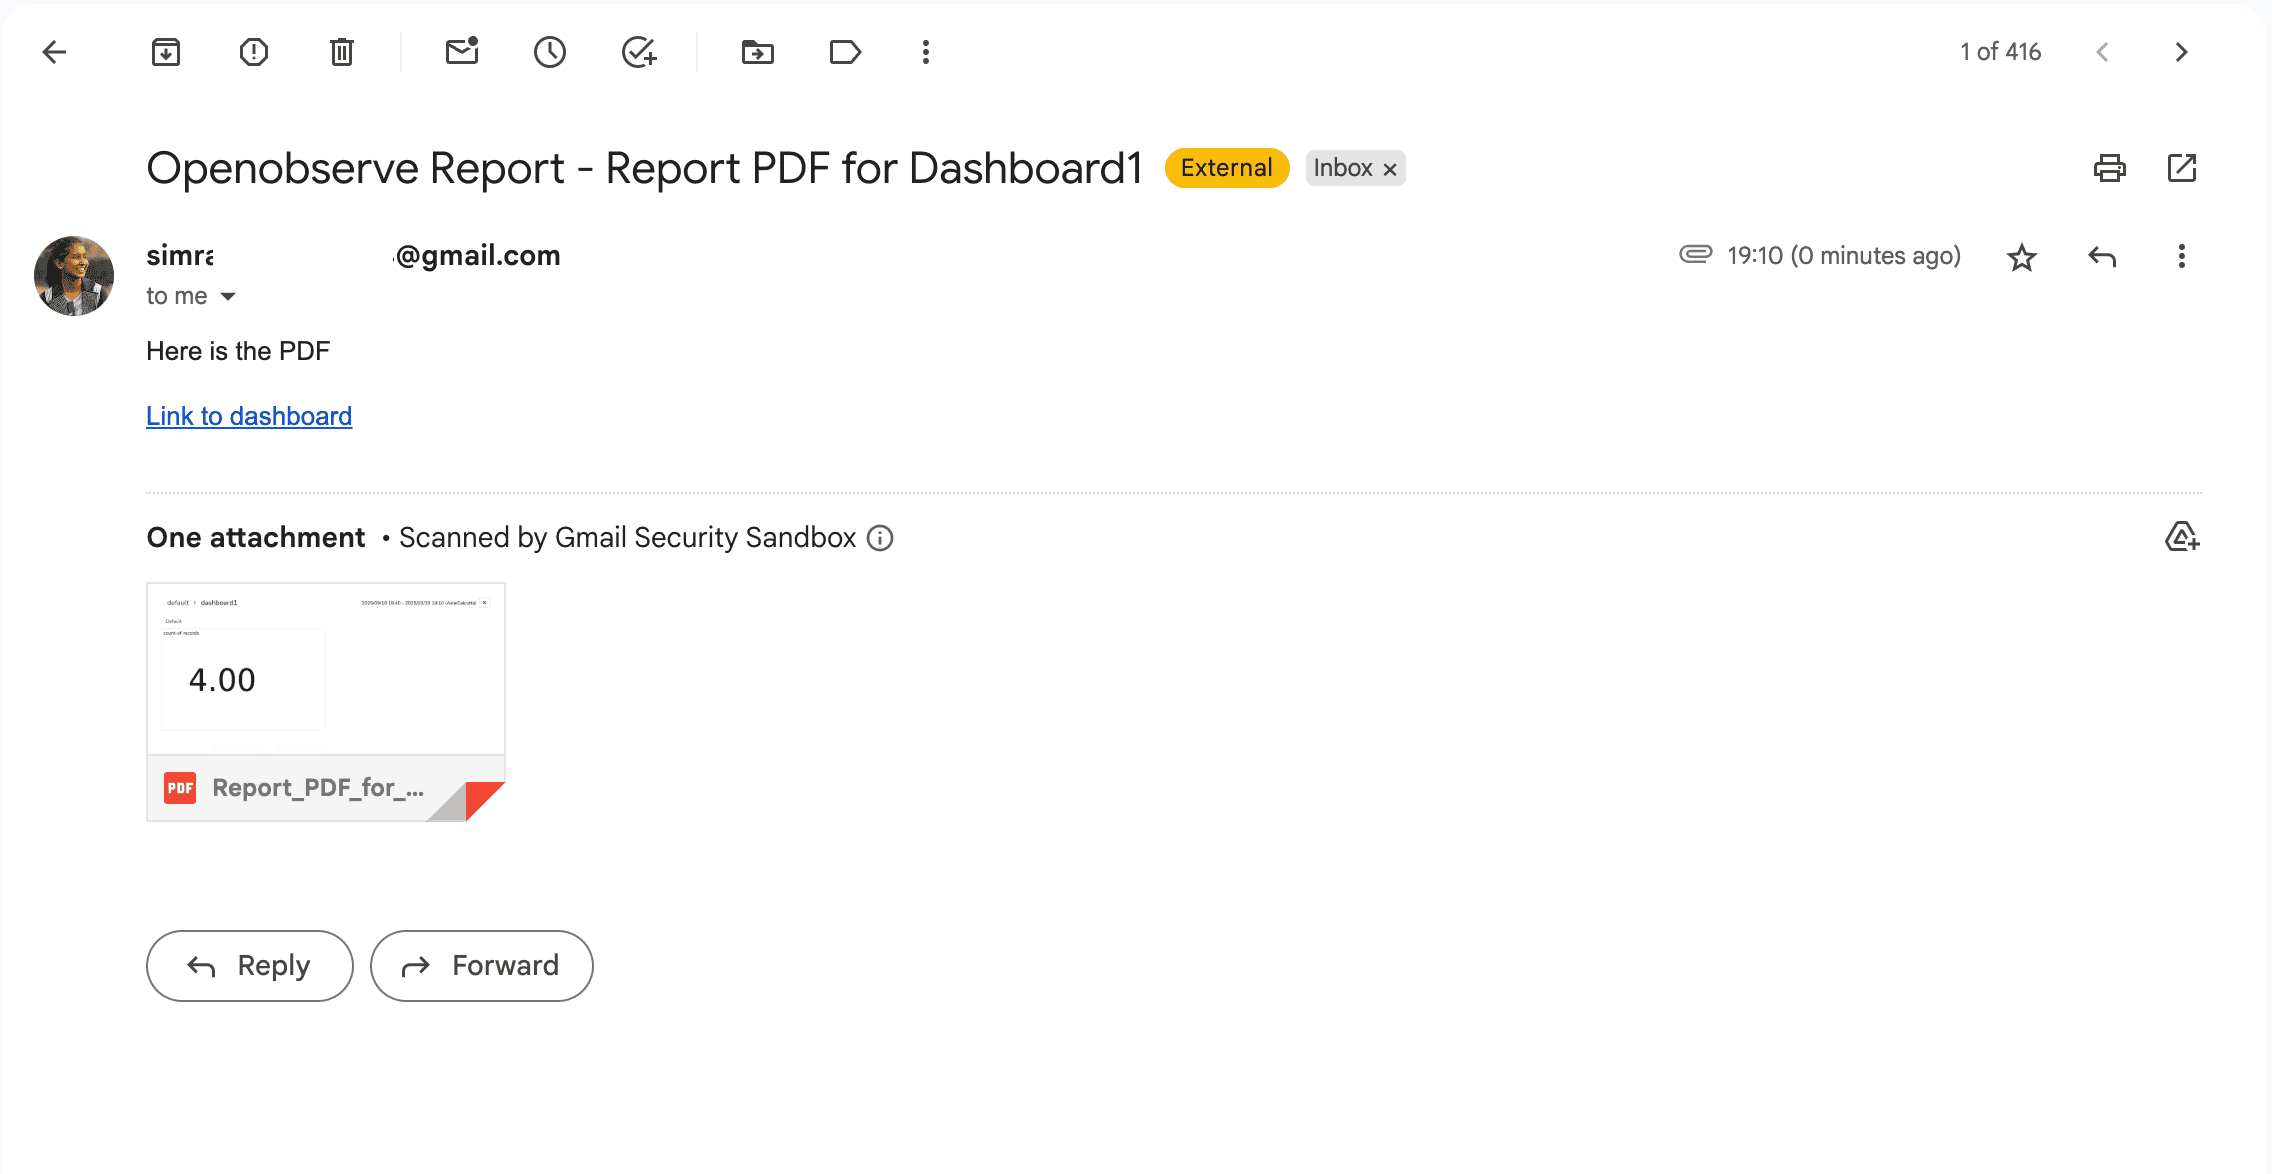
On a successful Report Trigger you will receive an email from the specified SMTP username, along with the Dashboard PDF.
 On successful run your report-server logs will show up like:

Running at Production Scale
If you plan to run the Report Server in production, it’s important to make it resilient and secure from the start.
- High Availability: Avoid depending on a single container. Deploy multiple Report Server replicas behind a load balancer so reports remain accessible even if one instance goes down. Store state, logs, and configurations on persistent volumes rather than temporary Docker storage.
- Email Throughput: For small teams, Gmail may suffice. However, once you’re sending hundreds of reports or addressing larger audiences, Gmail’s limits become a bottleneck. Transition to a production-ready SMTP service such as Amazon SES, Postmark, or your organization’s mail relay for reliable, high-volume delivery.
- Security: Never embed SMTP passwords directly in your docker run command. Instead, manage them securely using Docker Secrets or a .env file. Regularly rotate these credentials to reduce risk, particularly in regulated environments.
Troubleshooting
Even with the right environment variables, the first Docker setup is where most users stumble. Here are some common issues and their fixes:
1. Report Server not reachable from OpenObserve
Error contacting report server: error sending request for url (http://172.19.0.3:5090/api/…)
This usually occurs because the report server is listening only on 127.0.0.1. Other containers can’t access it that way.
Fix: Run the report server with -e ZO_HTTP_ADDR=0.0.0.0 so it listens on all interfaces.
Also, in OpenObserve’s environment, set:
-e ZO_REPORT_SERVER_URL=http://report-server:5090
Avoid using 172.x.x.x container IPs - they change. Always use the container name (report-server) on the same Docker network.
2. Chrome binary not detected If you see:
Chrome binary could not be detected
called `Result::unwrap()` on an `Err` value
The container can’t find Chrome to render dashboards.
Fix: Explicitly set a path with:
-e ZO_CHROME_PATH="./download/win64-1045629/chrome-win/chrome.exe"
3. Running as root without sandbox On Linux Docker, Chrome may fail with:
Running as root without --no-sandbox is not supported
Fix: Disable sandboxing in Docker with:
-e ZO_CHROME_NO_SANDBOX=true
This is safe inside container isolation, but in hardened environments, you may prefer running as a non-root user.
4. “No such file or directory” during PDF generation Error message:
Error generating pdf … No such file or directory (os error 2)
This usually means OpenObserve can’t be reached.
Fix: Make sure you set the correct web URL:
-e ZO_WEB_URL="http://openobserve:5080"
5. Chrome error page instead of login form
If you get errors like:
Error finding email input box
current url: chrome-error://chromewebdata/
That means Chrome loaded an error page instead of the OpenObserve login page.
Fix: Check that your login credentials are correct:
-e ZO_REPORT_USER_EMAIL="root@example.com"
-e ZO_REPORT_USER_PASSWORD="Complexpass#123"
And verify the report server can reach OpenObserve inside the container:
docker exec -it report-server curl http://openobserve:5080/
If you get a redirect to /web/, you’re good. If not, check your ZO_WEB_URL in OpenObserve’s container, it must not point to localhost.
Conclusion
The OpenObserve Report Server bridges the gap between real-time dashboards and shareable scheduled reports. By running the Report Server alongside your OpenObserve instance, you can automate PDF generation and email delivery, turning your dashboards into hands-free, scheduled snapshots of system health.
Try setting up your first scheduled report today and see how much easier it is to share observability with your team. For deeper configurations and advanced features, check out the OpenObserve documentation and explore more ways to streamline your observability workflows.
Next Steps
- Add Data Sources: Bring in new streams to enrich dashboards and reports.
- Create Dashboards: Design creative charts, panels, and visualizations to highlight key metrics.
- Set Alerts: Combine dashboards with alerts for real-time notifications alongside scheduled reports.
Ready to put this into practice? Sign up for an OpenObserve cloud account (14-day free trial) or visit our downloads page to self host OpenObserve.
About the Author
Simran Kumari

Passionate about observability, AI systems, and cloud-native tools. All in on DevOps and improving the developer experience.
Follow OpenObserve on Google
Add OpenObserve as a preferred source to see more of our articles in Google Search and Top Stories.