How to Configure Microsoft ADDS LDAP with OpenObserve and Dex: Complete Integration Guide

Chaitanya Sistla
April 23, 2025
5 min read
Don’t forget to share!
Try OpenObserve Cloud today for more efficient and performant observability.
Get Started For Free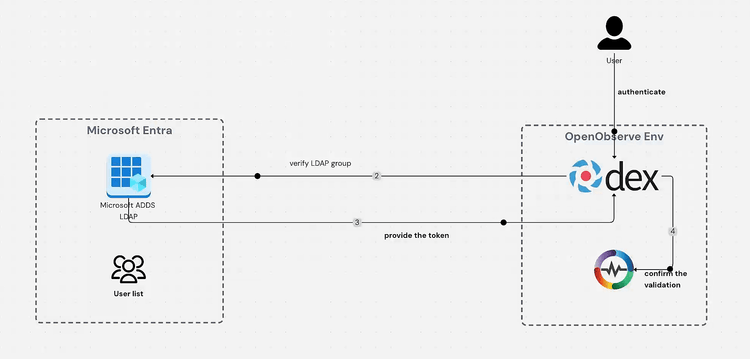
Microsoft Active Directory Domain Services (ADDS) is a directory service that provides authentication and authorization functions within Windows domain networks. It serves as a centralized database that stores information about network objects, including users, computers, printers, and more. LDAP (Lightweight Directory Access Protocol) is the protocol used to communicate with Active Directory.
Organizations implement Microsoft ADDS LDAP for several compelling reasons:
Centralized Authentication: It provides a single point of authentication for all users across the organization, simplifying user management.
Enhanced Security: By implementing ADDS LDAP, especially with secure LDAP (LDAPS), organizations can encrypt authentication traffic, protecting sensitive credentials.
Streamlined User Management: ADDS makes it easier to manage user accounts, group memberships, and access permissions across the entire network.
Single Sign-On (SSO) Capabilities: When integrated with tools like Dex and observability platforms like OpenObserve, it enables users to access multiple systems with a single set of credentials.
Begin by navigating to the Microsoft Entra Admin Center at https://entra.microsoft.com/#home. You'll need administrator credentials to access this portal.
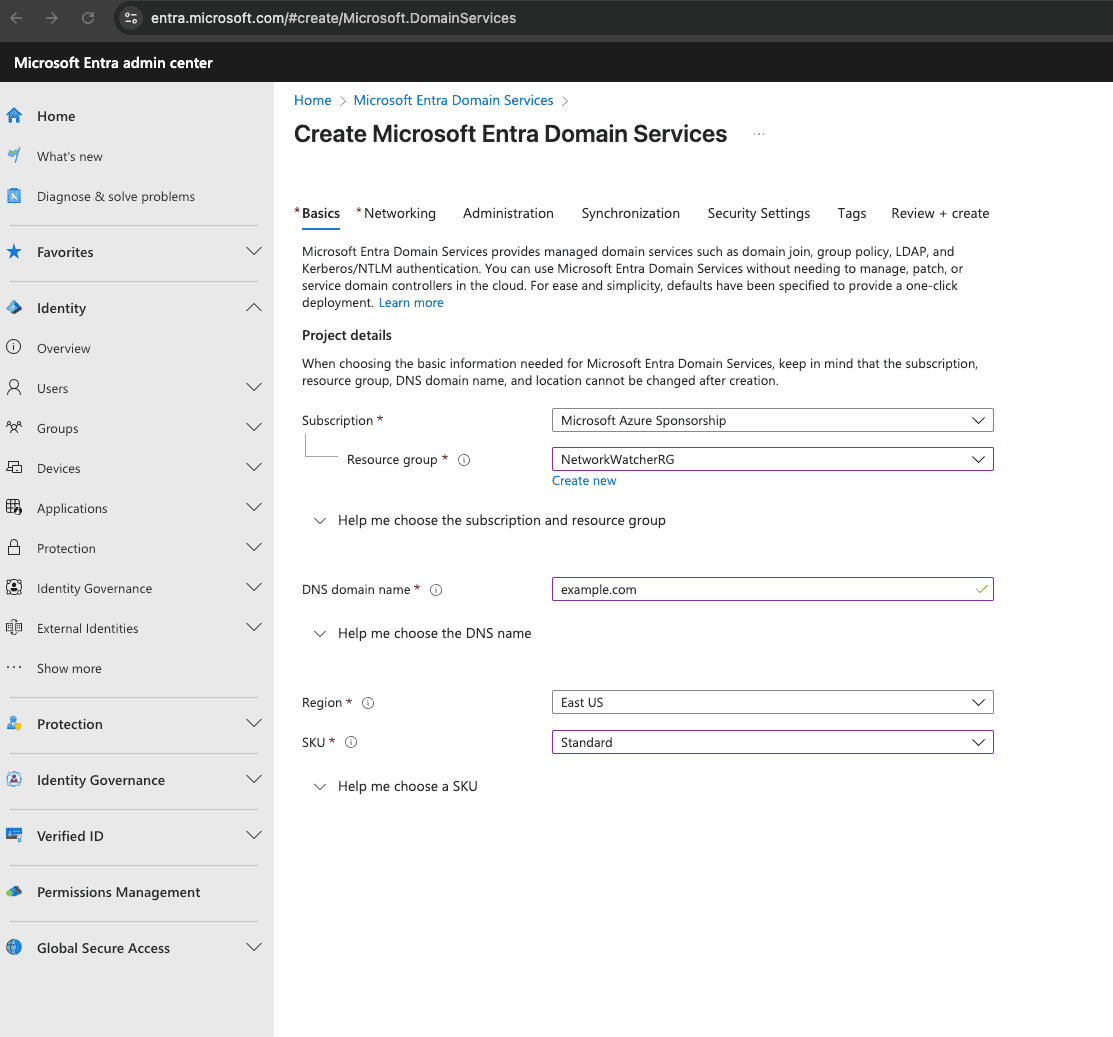
Note: The provisioning process typically takes 20-30 minutes to complete. You can monitor the deployment progress in the notifications area.
Once your Microsoft Entra Domain Services is active, you'll need to enable secure LDAP:
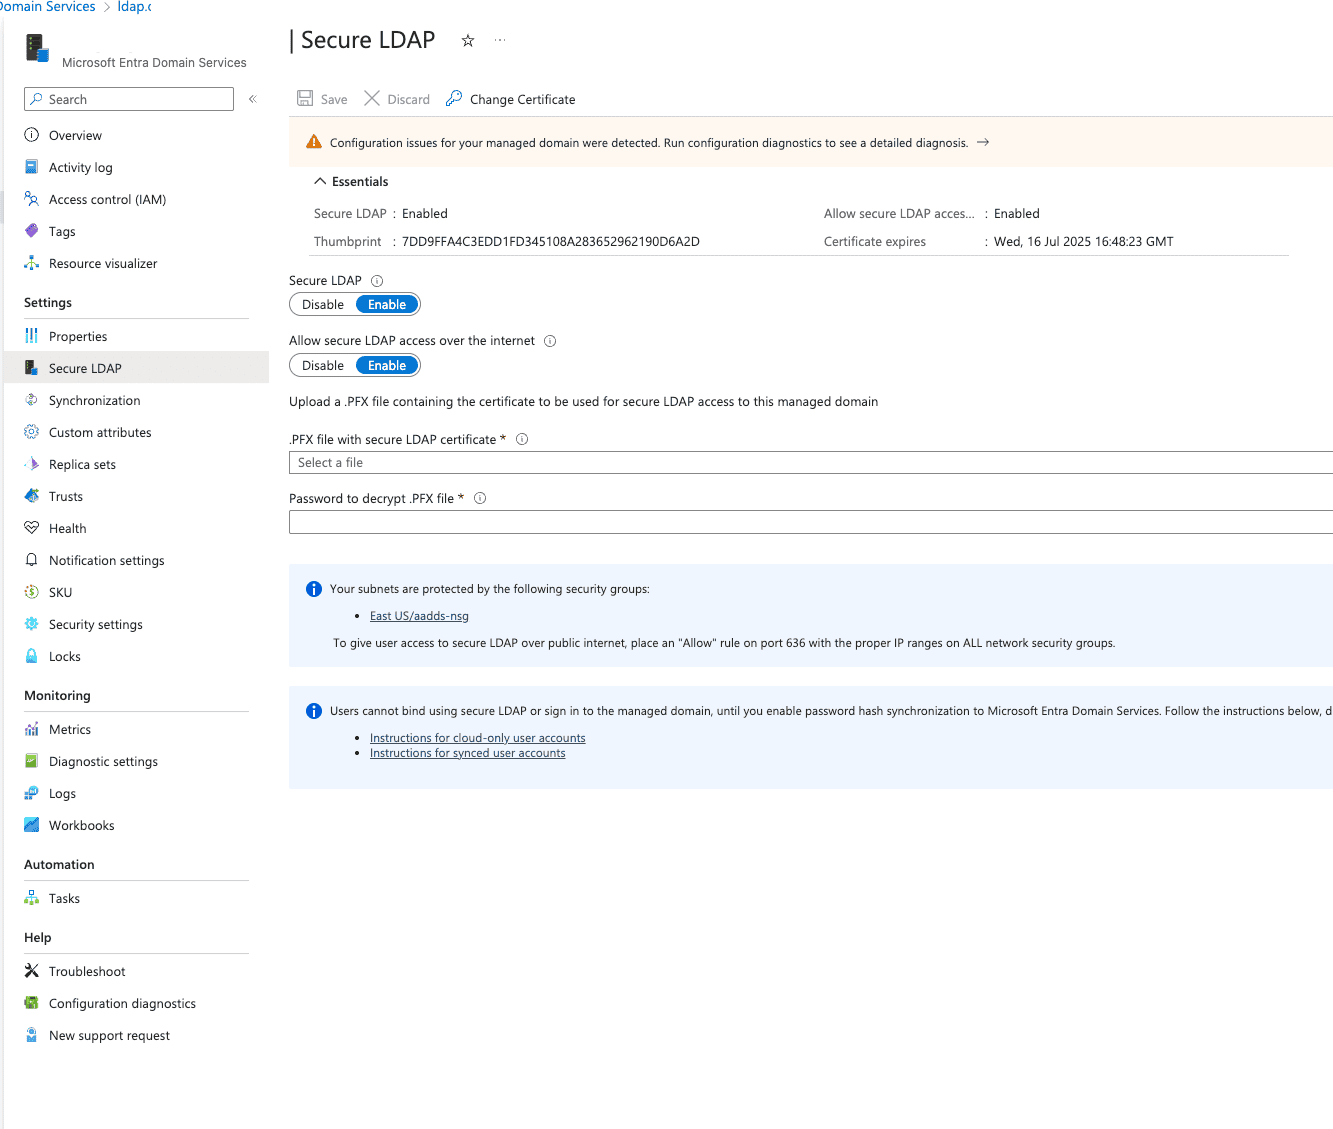
To enable secure LDAP connections, you'll need to generate a proper SSL certificate:
# Generate certificates using certbot
certbot certonly --manual --preferred-challenges dns -d *.ldap.example.com -d *.example.com -d example.com

# Convert the certificates to PFX format (you'll be prompted to create a password)
openssl pkcs12 -export -out certificate.pfx -inkey privkey.pem -in fullchain.pem -certfile chain.pem
To ensure secure access to your LDAP service:
Create a DNS record to make your LDAP service easily accessible:
ldap.example.com pointing to the secure LDAP external IP address you copied earlierNow that Microsoft ADDS LDAP is configured, you need to set up Dex (an identity service) to connect to it. Add the following configuration to your Dex config file:
- type: ldap
  id: ldap
  name: LDAP
  config:
    host: ldap.example.com:636
    bindDN: ldap_test@example.com
    bindPW: your_password_here
    usernamePrompt: SSO Username
    userSearch:
      baseDN: DC=ldap,DC=example,DC=com
      filter: "(objectClass=person)"
      username: userPrincipalName
      idAttr: objectGUID
      emailAttr: userPrincipalName
      nameAttr: displayName
      preferredUsernameAttr: sAMAccountName
Important: Replace the placeholder values (
example.com,your_password_here, etc.) with your actual domain and credentials.
For proper access control:
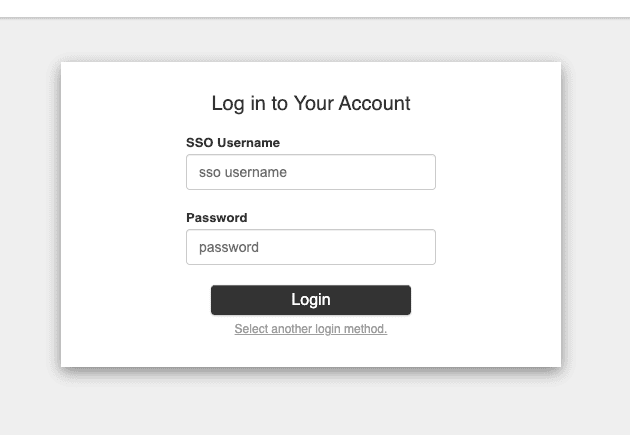
Finally, test the integration by:
Integrating Microsoft ADDS LDAP with OpenObserve through Dex represents a significant step forward in enterprise observability security. This configuration not only centralizes user authentication but also enhances security by enabling encrypted LDAPS connections and leveraging your existing Active Directory infrastructure.
By following this guide, you've successfully implemented a robust authentication mechanism that simplifies user management while maintaining strong security practices. Your observability platform is now seamlessly integrated with your organization's identity management system, allowing for streamlined access control and reduced administrative overhead.
Furthermore, this integration enables your team to maintain consistent access policies across your entire technology stack, ensuring that only authorized personnel can access sensitive monitoring and observability data. As your organization grows, this LDAP integration will scale with you, continuing to provide secure, centralized authentication for all your observability needs.
Remember to regularly rotate certificates, review access permissions, and keep your Directory Services updated to maintain the highest level of security for your observability platform.
Get Started with OpenObserve Today!
Sign up for a free trial of OpenObserve on our website. Check out our GitHub repository for self-hosting and contribution opportunities.
Chaitanya Sistla is a Principal Solutions Architect with 17X certifications across Cloud, Data, DevOps, and Cybersecurity. Leveraging extensive startup experience and a focus on MLOps, Chaitanya excels at designing scalable, innovative solutions that drive operational excellence and business transformation.